
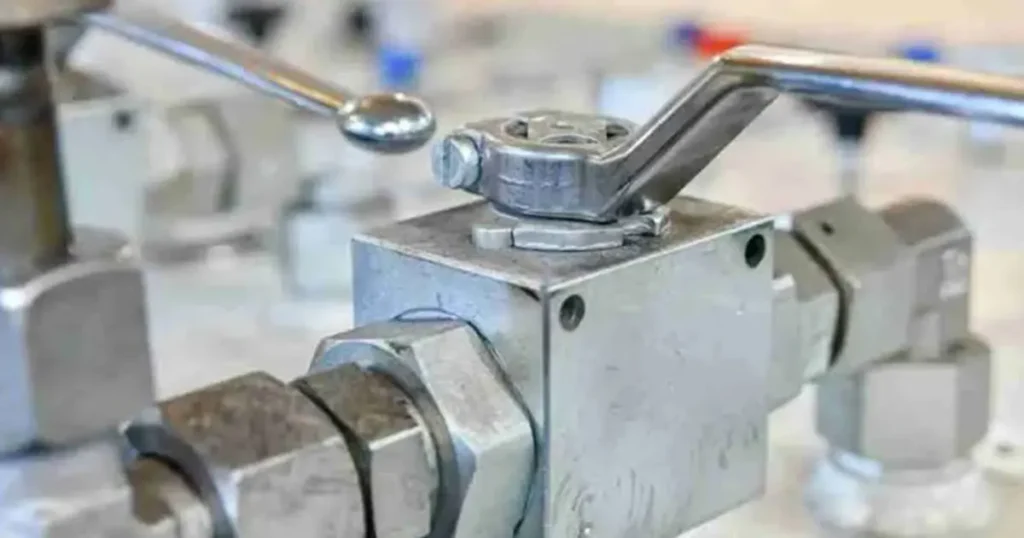
You keep a hydraulic ball valve working well by checking it often. Clean it and change old parts right away. Regular ball valve maintenance helps you find problems early. This way, you stop sudden breakdowns or leaks. When you pay attention, you notice seal wear and stem problems. You can also find small cracks before they get worse.
Always take the pressure out and separate the hydraulic system before you start any maintenance. This easy step keeps you safe and protects your equipment.
Key Takeaways
- Doing regular maintenance on hydraulic ball valves stops leaks and breakdowns. Check the valves at least once a month to find problems early.
- Always let out the pressure from the system before you start maintenance. This keeps you safe and protects your equipment.
- Use the right tools and lubricants when doing maintenance. The correct equipment stops damage and helps the valve work well.
- Check seals, stems, and connections often. Look for things like wear, rust, or leaks to keep the valve working right.
- Make sure the hydraulic fluid stays clean. Dirty fluid can cause parts to wear out and make leaks, so check and change it when needed.
- Watch for warning signs like leaks or handles that are hard to turn. Fixing these problems early can save you time and money.
- Pick replacement valves by looking at pressure ratings and connection types. Make sure they fit your system for the best performance.
- Write down what you do and find during maintenance. Keeping records helps you know how the valve is doing and plan for future maintenance.
Why Ball Valve Maintenance Matters
Reliability and Safety
You want your hydraulic system to work well every time. Checking the valve often helps you find problems early. If you look at the valve each month, you can see leaks or worn seals. You might also notice if the handle is not straight. These checks help keep your system safe and working.
Safety Tip: Do not use a ball valve as your only way to stop flow. Ball valves can make you think everything is safe when it is not. The seats and seals can leak or break. Sometimes, the handle looks closed, but the valve is still open. Even if you use two ball valves, you can still have trouble because of design problems.
Here are some safety problems that happen if you skip valve checks:
- Leaks from broken seats or seals
- Handles that are not lined up right
- Using ball valves to stop flow without checking with the maker
- Not testing the actuator, which can cause shutdowns to fail
- Forgetting your monthly checks, which can lead to danger
You can stop these problems by doing your monthly checks. This keeps your team safe and your equipment working.
Cost and Downtime Reduction
Checking your valve saves money and time. If you follow a plan, you find small problems before they get big. You do not wait for things to break. This means you pay less for repairs and do not stop work for long.
Here is how different valve checks help you:
| Maintenance Task | Benefit |
|---|---|
| Regular lubrication | Makes the valve last longer and stops surprise breakdowns |
| Torque checks | Makes sure the valve works and does not fail |
| Seat leakage testing | Finds problems early so you do not pay a lot for repairs |
If you skip your monthly checks, you will have to fix things after they break. This costs more and takes more time. You might also hurt other parts of your system. If you check your valve often, your plant works better and does not stop.
Environmental Impact
Valve checks do more than protect your equipment. They also help the environment. If you check your valve each month, you can stop leaks before they start. Leaks from hydraulic ball valves can hurt nature.
Here are some problems from not checking your valve:
- Fluid leaks can get into dirt and water
- Bad seals can let out gases that make the air dirty
- Changing valves too much makes waste and hurts the earth
You can stop these problems by checking your valve often. These steps protect your business and the world. Make monthly checks a habit to keep your system safe, save money, and help the planet.
Inspection Frequency
You might wonder how often you should check your hydraulic ball valves. The answer depends on several things. If you want your valves to last and work safely, you need to set the right schedule for routine inspections. Let’s look at what affects your inspection plan.
Factors Affecting Schedule
Pressure and Cycle Rate
High pressure puts more stress on your valves. If your system runs at high pressure or cycles on and off a lot, your valves wear out faster. You should check these valves more often. If you notice the handle gets harder to turn or you hear odd noises, it’s time for a closer look.
Fluid Cleanliness
Dirty fluid can cause big problems. Dirt and debris scratch the inside of your valve. This leads to leaks and makes the valve hard to operate. If your system uses clean fluid, you can wait longer between checks. If you see cloudy or dirty oil, you should inspect your valves sooner.
Temperature and Vibration
Heat and shaking can damage your valves. High temperatures make seals wear out quickly. Vibration can loosen fittings and cause leaks. If your system runs hot or shakes a lot, you need to check your valves more often.
Application Conditions
Every job is different. Some valves control important safety systems. Others just handle basic flow. If a valve is critical for safety, you should inspect it more often. Also, if your team has less training, mistakes can happen. Lack of formal training among technicians increases the risk of failures. Regular testing helps catch problems early, especially when untrained people work on your system.
Tip: Safety valves need extra attention. If a valve protects people or equipment, make it a top priority in your inspection plan.
Setting Inspection Intervals
You want to find the right balance. If you check too often, you waste time. If you wait too long, you risk leaks or breakdowns. The recommended preventive maintenance frequency depends on your system’s pressure, how clean your fluid is, and how important the valve is to your operation. For most industrial systems, the recommended preventive maintenance frequency is once a month. If your system is very clean and runs at low pressure, you might stretch this to every three months. If you spot leaks, noise, or hard operation, check right away.
A simple table can help you decide:
| System Condition | Inspection Interval |
|---|---|
| High pressure/cycle | Every month |
| Dirty fluid | Every month |
| High temp/vibration | Every month |
| Clean, low-stress use | Every 3 months |
| Safety-critical valve | Every month or sooner |
Remember, your inspection plan should fit your system. Adjust your schedule if you see problems or if your team changes.
Safety Checks Before Valve Maintenance
Before you start, make sure the hydraulic system is safe. If you skip safety steps, someone could get hurt or things could break. Here are the things you should always do before working on a valve.
Shutdown and Isolation
First, turn off the system. This stops all fluid from moving to the ball valve. Close both the upstream and downstream block valves. This keeps the area where you work safe. You do not want any fluid to leak while you are working. If you forget this, you could get leaks or a sudden burst of pressure.
Here is a table with the main safety steps:
| Safety Step | Description |
|---|---|
| Shut down the system | Close both block valves to keep the valve alone. |
| Depressurize the line completely | Make sure there is no pressure left before you take things apart. |
| Follow lockout/tagout procedures | Stop the system from turning on by accident. |
| Confirm zero pressure with proper gauges | Check with gauges to be sure it is safe to work. |
You can use this table as a checklist before you start. It helps you remember every step and keeps everyone safe.
Depressurization Steps
After you close the valves, you need to let out all the pressure. Open the bleed valves or use the pressure relief points. Watch the pressure gauges until they show zero. Do not just look at the pipes. Sometimes, pressure stays inside even if things look calm. If you hear a hiss or see fluid, wait until it stops. Only move on when you know it is safe.
Checking your system often helps you find pressure problems early. If a gauge does not go to zero, you might have a blockage or a bad valve. Fix these problems before you keep going.
PPE Requirements
Now, let’s talk about personal protective equipment, or PPE. You need to keep yourself safe from fluid and moving parts. Always wear safety glasses to protect your eyes. Gloves help keep your hands safe from sharp or hot things. Wear long sleeves and strong shoes. If it is loud, wear ear protection. Some jobs need face shields or aprons if you think there will be splashes.
Safety Tip: Never skip your PPE, even for short jobs. Accidents can happen fast, and the right gear keeps you safe.
If you follow these safety checks, your maintenance job will go well and be safe. It also makes regular checks easier and safer for your whole team.
Lockout/Tagout
You want to make sure nobody turns on the hydraulic system while you work. Lockout/tagout (LOTO) keeps you safe. This step stops accidents and protects your team. You use special locks and tags to show that the valve is under maintenance. Only you or your team can remove these locks.
Here’s how you do it:
- Find the main power switch or control for the hydraulic system.
- Turn off the power. Make sure the system cannot start.
- Place a lock on the switch or valve. Use a tag with your name and the date.
- Tell your team that you locked out the system. Everyone needs to know.
- Keep the key with you. Do not let anyone else unlock the system.
Tip: Always use a bright tag. Write your contact info. This helps others find you if they have questions.
A simple table shows what you need for lockout/tagout:
| Item | Purpose |
|---|---|
| Lock | Stops others from turning on the system |
| Tag | Shows who locked out the system |
| Key | Lets you unlock when finished |
| Log Sheet | Tracks who locked out and when |
You protect yourself and your coworkers with lockout/tagout. You stop the system from starting by accident. You also show everyone that the valve is not ready for use.
Confirming Safe Conditions
You need to check that everything is safe before you start maintenance. Look at the gauges. Make sure they show zero pressure. Touch the pipes. They should feel cool and quiet. Listen for any hissing or movement. If you hear anything, wait until it stops.
Check these things:
- Pressure gauges show zero.
- No fluid leaks around the valve.
- Pipes and fittings feel cool.
- No vibration or noise.
- Lockout/tagout tags are in place.
Note: If you see fluid or hear noise, stop. Double-check your isolation steps. You might need to bleed the system again.
You can use a checklist to confirm safe conditions:
- Gauges read zero
- No leaks
- Pipes are cool
- No vibration
- Lockout/tagout tags in place
You keep your team safe by checking these things. You make sure the valve is ready for maintenance. You avoid surprises and accidents. Always confirm safe conditions before you touch the valve.
Ball Valve Parts to Inspect
When you check your hydraulic ball valve, you want to look at all the main parts. Each part can show early signs of trouble. If you spot problems soon, you can fix them before they get worse. Let’s break down what you need to inspect.
Body and Ports
Start with the valve body and the ports. The body holds everything together. The ports let fluid in and out. You want to make sure these parts stay strong and clean.
- Look for cracks or dents on the valve body. Even small marks can grow into bigger problems.
- Check for paint damage or rust. Rust means water or fluid is getting where it should not.
- Wipe the ports and see if you find any oil or dirt. Clean ports help your valve work better.
- Watch for leaks around the body. Leaks often show up as wet spots or stains.
- Feel the outside. If it feels sticky or oily, you might have a slow leak.
Tip: If you see any corrosion or damage, mark it down. Take a picture if you can. This helps you track changes over time.
Connections
Next, check the connections. These are where the valve joins to pipes or hoses. Bad connections can cause leaks or even make the valve come loose.
- Inspect all bolts, nuts, and flanges. Make sure nothing is loose or missing.
- Look for signs of leaks at the joints. Wet spots or drips mean you need to tighten or replace something.
- Check the gaskets and seals. If they look worn or cracked, swap them out.
- Make sure the packing gland is tight. This part keeps fluid from leaking along the stem.
- Feel for vibration when the system runs. Too much shaking can loosen connections.
A quick table helps you remember what to check:
| Connection Part | What to Look For |
|---|---|
| Bolts/Nuts | Tightness, rust |
| Flanges | Leaks, cracks |
| Gaskets/Seals | Wear, damage |
| Packing Gland | Leaks, looseness |
Handle and Lock
The handle lets you open and close the valve. The lock keeps it in the right spot. If these parts do not work well, you might not control the flow like you want.
- Move the handle back and forth. It should turn smoothly without sticking.
- Check if the handle lines up with the open and closed marks. If not, you might have a problem inside.
- Look for any bends or cracks in the handle. A bent handle can break off.
- Test the lock. Make sure it holds the handle in place and does not slip.
- Watch for signs of over-torquing. If someone forced the handle, you might see damage or feel extra resistance.
Note: If the handle feels hard to move or the lock does not hold, fix it right away. Smooth operation means safer and easier control.
When you check these parts, you keep your valve working longer. You also stop leaks and avoid sudden breakdowns. Make these checks part of your regular routine, and your hydraulic system will thank you.
Stem, Seats, and Seals
When you check your hydraulic ball valve, pay close attention to the stem, seats, and seals. These parts keep the valve tight and help it move smoothly. If you ignore them, you might face leaks or hard operation.
Start with the stem. Turn the handle and feel for smooth movement. If the stem feels stiff or you need extra force, something could be wrong. Dirt or old grease can make the stem hard to turn. Sometimes, you might notice increased actuation torque. This means you should clean the stem and add fresh lubricant. If the problem stays, check for damage or wear.
Next, look at the seats. The seats press against the ball inside the valve. They stop fluid from leaking when the valve is closed. Worn or damaged seats can cause leaks. Shine a light inside the valve if you can. Look for scratches, chips, or uneven surfaces. If you see any, replace the seats right away.
Now, inspect the seals. Seals keep fluid from escaping around the stem and body. If you spot any leaks near these areas, the seals might be worn out. You should replace damaged seals as soon as possible. Always check for cracks or swelling. Swollen seals can mean the wrong fluid or temperature is being used.
Tip: Lubricate the valve stem after cleaning. This helps the valve move easily and keeps the seals in good shape.
O-Rings and Stem Tips
O-rings and stem tips are small but important. They help the valve stay leak-free and easy to use. If these parts wear out, you might see leaks or feel resistance when turning the handle.
Check the O-rings for cracks, flat spots, or signs of wear. If you see any damage, swap them out. A good O-ring should feel soft and springy. Hard or brittle O-rings need to go. Look at the stem tip as well. If it looks worn or bent, replace it. A damaged stem tip can make the valve hard to operate and may cause leaks.
Here’s a quick checklist for O-rings and stem tips:
- Inspect for cracks or flat spots
- Replace if hard or brittle
- Check stem tip for wear or bending
- Lubricate new O-rings before installing
Corrosion and Damage
Corrosion and damage can shorten your valve’s life. You want to catch these problems early. Look for rust, pitting, or discoloration on the valve body and ports. Even small spots can grow fast, especially in wet or harsh environments.
Leaks around the valve body or stem often point to corrosion or damage. If you see fluid, check the seals and O-rings first. Replace any that look worn. Tighten loose bolts, but don’t overdo it. If you find a cracked valve body, you need to replace the whole valve.
Here’s a table to help you spot common signs and what to do:
| Sign of Damage | Possible Causes | Solutions |
|---|---|---|
| Body Leakage | Loose bolts, bad seals, cracked body, high pressure | Tighten bolts, replace seals, change valve if cracked, check system limits |
You can also watch for these warning signs:
- Leakage around the valve body or stem
- Rust or pitting on metal surfaces
- Hard-to-turn handle
- Unusual noises or vibration
Note: If you find any serious damage, fix it right away. Quick action keeps your system safe and running.
Loose Fittings
Loose fittings can cause big problems in your hydraulic ball valve. If you ignore them, you might see leaks or even lose control of the valve. You want to check all fittings every time you inspect the valve. Look at the bolts, nuts, and connectors. If you see any movement or gaps, tighten them right away.
Here’s what you should do:
- Use a wrench to test each bolt and nut. If you feel any wiggle, tighten it.
- Check hose connections. Make sure they sit snug and do not twist.
- Look for signs of leaks near fittings. Wet spots or drips mean something is loose.
- Inspect clamps and brackets. They should hold the valve steady.
Tip: If you find a fitting that keeps coming loose, mark it for extra checks. Sometimes vibration or pressure makes certain spots loosen more often.
You can use a simple table to track your fitting checks:
| Fitting Type | Check for Tightness | Signs of Leak | Action Needed |
|---|---|---|---|
| Bolts/Nuts | Yes | Wet spots | Tighten |
| Hose Connectors | Yes | Drips | Secure |
| Clamps/Brackets | Yes | Movement | Adjust |
Loose fittings can lead to leaks, noise, and even damage. If you keep them tight, your valve works better and lasts longer.
Operating Resistance
Operating resistance tells you how easy it is to turn the valve handle. If you feel too much resistance, something might be wrong inside the valve. You want the handle to move smoothly. If it sticks or feels hard, check for dirt, old grease, or worn parts.
Try these steps:
- Turn the handle slowly. Notice if it moves with steady force.
- If the handle feels stiff, clean the stem and add fresh lubricant.
- Listen for grinding or squeaking sounds. These noises mean you need to check inside.
- If resistance stays high after cleaning, inspect the seats and seals. They might be worn or swollen.
Note: Hard operation can mean the valve has internal damage. If you cannot fix it with cleaning and lubrication, you may need to replace parts.
You can use a checklist to track operating resistance:
- Handle moves smoothly
- No grinding or squeaking
- Resistance stays steady
- Lubricant is fresh
- Seats and seals look good
If you pay attention to operating resistance, you catch problems early. Smooth operation keeps your hydraulic system safe and easy to use. You avoid sudden breakdowns and keep your equipment running strong.
Ball Valve Maintenance Checklist
A good ball valve maintenance checklist helps you spot trouble before it gets serious. You want your hydraulic system to run smoothly and prevent leakage. Let’s walk through the first steps of a solid checklist. These steps cover both outside and inside parts of the valve. You can use these checklists every time you do ball valve maintenance.
Visual Inspection
Start with a careful look at your valve. You want to catch any problems early. Here’s how you do a visual inspection:
- Look at the outside of the valve. Check for dents, cracks, or rust.
- Make sure all bolts and nuts are tight. Use a torque wrench if you have one.
- Check the paint and labels. They should be clear and not peeling.
- Inspect the ports and ends. They should be clean and free from dirt or oil.
- Use a flashlight to peek inside if you can. Look for debris or scratches.
- Compare the valve’s size and shape to your specs. Use a tape measure or caliper if needed.
- Check the actuator and mounting. Make sure everything sits straight and secure.
Tip: Take notes or photos if you see anything odd. This helps you track changes over time.
A table can help you remember what to check:
| Inspection Point | What to Look For |
|---|---|
| Valve Body | Cracks, dents, rust |
| Fasteners | Tightness, rust, missing parts |
| Ports/Ends | Cleanliness, oil, debris |
| Labels/Paint | Clarity, peeling |
| Actuator/Mounting | Alignment, security |
You want to do this visual check every time you follow your ball valve maintenance checklist. It’s one of the most common ball valve maintenance procedures.
Leak Check
Leaks can cause big problems fast. You want to find them before they get worse. Here’s how you check for leaks:
- Wipe the valve and connections with a clean rag.
- Look for wet spots, drips, or stains around the valve.
- Run your finger along the seams and fittings. If you feel oil, you might have a leak.
- Use a pressure gauge to test the valve under normal system pressure.
- Try a bubble test. Mix a little soap and water, then brush it on the joints. If you see bubbles, you found a leak.
- For hard-to-find leaks, use a thermal camera or ultrasonic leak detector.
Here’s a quick table of leak detection methods:
| Method | How It Works |
|---|---|
| Visual Check | Spot wet spots, drips, or stains |
| Bubble Test | Bubbles show leaks when using soapy water |
| Pressure Test | Checks for drops in pressure |
| Thermal Imaging | Finds hot or cold spots from leaking fluid |
| Ultrasonic Test | Hears high-pitched sounds from escaping fluid |
Note: Always fix leaks right away. Small leaks can turn into big messes and cost you money.
You want to include leak checks in every ball valve maintenance checklist. This step helps you prevent leakage and keeps your system safe.
Handle Operation
The handle tells you a lot about your valve’s health. You want it to move smoothly and line up with the open and closed marks. Here’s how you check handle operation:
- Turn the handle from open to closed. It should move with steady, easy force.
- Listen for squeaks or grinding. These sounds mean you need to clean or lubricate the stem.
- Make sure the handle lines up with the open and closed positions. If it doesn’t, check for worn parts inside.
- Try moving the handle quickly and slowly. It should feel the same both ways.
- If you have an actuator, run a few cycles. Watch for any sticking or slow movement.
- Check for feedback signals if your valve has sensors. Make sure the signals match the handle’s position.
Tip: If the handle feels stiff or loose, add lubricant or replace worn parts. Smooth handle operation means your valve is working right.
You want to test handle operation every time you use your ball valve maintenance checklist. This step helps you spot problems before they stop your system.
By following these checklists, you keep your valves in top shape. You also make your maintenance routine easier and more reliable.
Connection Tightness
You want every connection on your hydraulic ball valve to stay tight and secure. Loose connections can cause leaks, pressure drops, or even sudden failures. When you do your ball valve maintenance, always check each fitting, nut, and bolt for proper tightness.
Start by using the right tool. A torque wrench helps you avoid over-tightening or under-tightening. Each connection type has its own recommended torque value. If you use the wrong amount of force, you might damage the threads or crush the seal. Here’s a handy table with common torque values for different connection sizes:
| Connection | Recommended Torque |
|---|---|
| AF1 | 55 inch pounds |
| AF2 | 10 foot pounds initial, 25 foot pounds final |
| AF4 | 30 foot pounds initial, 50 foot pounds final |
| AF6 | 40 foot pounds initial, 60 foot pounds final |
| LF4 | 20 foot pounds |
| LF6 | 30 foot pounds |
| LF9 | 50 foot pounds |
| LF12 | 90 foot pounds |
| LF16 | 125 foot pounds |
| HF2 | 75 inch pounds |
| HF4 | 25 foot pounds |
| HF6 | 50 foot pounds |
| HF9 | 110 foot pounds |
| HF16 | 150 foot pounds |
| XF4 | 45 foot pounds |
| XF6 | 70 foot pounds |
Check each connection by gently testing for movement. If you find a loose fitting, tighten it to the value in the table. Don’t guess—always use the right torque. If you see a connection that loosens often, mark it for extra checks. Vibration or pressure changes can make some spots loosen more than others.
Tip: After you tighten connections, run the system and check again. Sometimes, fittings settle and need a second tightening.
Corrosion Check
Corrosion can sneak up on you and ruin your valve before you know it. You want to catch rust, pitting, or discoloration early. These signs mean water or chemicals are attacking the metal. Corrosion weakens the valve and can lead to leaks or sudden breaks.
Here’s how you check for corrosion:
- Look at the valve body, ports, and fittings. Use a flashlight to see hidden spots.
- Feel for rough or bumpy areas. Smooth metal should not feel gritty.
- Check under clamps and brackets. Moisture can hide there.
- Watch for orange, brown, or green stains. These colors often mean rust or chemical attack.
- If you see white powder, that’s a sign of aluminum or zinc corrosion.
If you find corrosion, clean the area with a wire brush or approved solvent. For deep pits or cracks, replace the part right away. You want to stop corrosion before it spreads. After cleaning, apply a protective coating if your system allows it.
Note: Corrosion often means there’s a leak or moisture problem nearby. Fix the root cause, not just the symptom.
Oil Contamination
Clean oil keeps your hydraulic ball valve working smoothly. Dirty oil can cause wear, leaks, and sticky operation. You want to check your oil for contamination every time you do ball valve maintenance.
Best practices for oil contamination control include:
- Regular oil condition monitoring
- Using effective filtration systems
- Replacing oil when it gets dirty or old
- Keeping oil as clean as your equipment maker recommends
When you check your oil, follow these steps:
- Monitor the oil’s viscosity. Thick or thin oil can mean trouble.
- Check the Acid Number (AN). High acid means the oil is breaking down.
- Assess water content. Water in oil causes rust and poor performance.
- Look for wear metals. These tiny bits show parts are wearing out.
- Detect other contaminants like dirt or sludge.
If you find dirty oil, change it right away. Clean the reservoir and flush the lines if needed. Always use the right oil for your system. Good oil means fewer problems and a longer life for your valve.
Tip: Keep a log of your oil checks. This helps you spot trends and catch problems early.
Pressure and Temperature
You want your hydraulic ball valve to work in the right conditions. Checking pressure and temperature helps you spot problems before they get worse. High pressure can damage seals and seats. Low pressure might mean you have a leak. If the temperature gets too high, seals can swell or crack. Cold temperatures can make parts stiff or brittle.
Here’s how you check pressure and temperature:
- Read the pressure gauge near the valve. Make sure it matches your system’s normal range.
- Use a thermometer or temperature sensor to check the valve body. Compare it to the recommended limits.
- Watch for sudden changes. A fast drop in pressure or a spike in temperature means something is wrong.
- If you see steam, frost, or hear hissing, stop and check for leaks or blockages.
A simple table helps you track what to look for:
| What to Check | Normal Range | Warning Signs |
|---|---|---|
| Pressure | System spec | Sudden drops/spikes |
| Temperature | System spec | Overheating, freezing |
Tip: Write down your readings each time you do ball valve maintenance. This helps you spot trends and catch problems early.
Noise and Vibration
Noise and vibration can tell you a lot about your valve’s health. A quiet valve usually means things are working well. If you hear rattling, banging, or whistling, you might have loose parts or a blockage. Vibration can loosen fittings and cause leaks.
Here’s what you should do:
- Listen to the valve when the system is running. Notice any new or strange sounds.
- Feel the valve body and pipes. A little vibration is normal, but strong shaking is not.
- Check for loose bolts or brackets. Tighten them if needed.
- If you hear a high-pitched whine, you might have fluid passing through a small leak.
- Loud banging can mean water hammer or trapped air.
A quick checklist for noise and vibration:
- Valve sounds normal
- No rattling or banging
- No strong vibration
- All fittings tight
Note: If you notice new noises or more vibration than usual, stop and inspect the valve. Fixing small problems now can save you from bigger repairs later.
Maintenance Records
Keeping good records is a big part of smart ball valve maintenance. When you write things down, you make it easy to track problems and plan repairs. Good records also help you follow safety rules and prove you did your checks.
Here’s what you should record:
- Set pressure, pop pressure, and reseat pressure for each valve
- Spring ID or part numbers
- Test date and next due date (attach a metal tag to the valve)
- Inspection schedule for every valve
- Test history and any repairs or rebuilds
- Component replacement history
You should store your records in a safe place. File the test report with your facility records and your insurance company. Update your computerized maintenance management system (CMMS) with all test data. Keep your records for at least 7 years, as many rules require this.
A simple list helps you remember what to do:
- Attach a metal tag to each valve with test and due dates
- File reports with facility and insurance records
- Update the CMMS with all test and repair data
- Keep records for at least 7 years
- Use a valve registry to track and schedule inspections
Tip: A good record system makes your job easier. You can see when each valve needs service and what was done last time. This helps you plan ahead and avoid missed checks.
Checking for External Leakage
Stem and Body Inspection
You want to start by looking at the stem and body of your hydraulic ball valve. These parts can show early signs of trouble. Grab a flashlight and check for wet spots, stains, or shiny areas. If you see oil around the stem, you might have a leak. Touch the body and stem. If they feel slippery or sticky, that’s a warning sign. Sometimes, you’ll spot rust or pitting. These marks mean water or chemicals are attacking the metal. If you notice cracks or dents, write them down and take a photo. Small cracks can grow fast. You should also check for swelling or bulging. These shapes can mean pressure is pushing against weak spots.
Tip: If you find any leaks or damage, clean the area and mark it for extra checks next time.
Threads and Flanges
Threads and flanges connect your valve to pipes and hoses. If these parts loosen, you can get valve leakage. Look at the threads for signs of wear or cross-threading. If you see metal shavings or stripped threads, tighten or replace them. Check the flanges for gaps or uneven surfaces. Run your finger along the edge. If you feel a bump or dip, you might have a problem. Use a wrench to test each bolt. If you find a loose bolt, tighten it to the right torque. Sometimes, vibration shakes bolts loose. You should check for leaks around the flange. Wet spots or drips mean you need to fix the seal.
Here’s a quick checklist for threads and flanges:
- Inspect for loose bolts
- Look for metal shavings
- Check for gaps or uneven surfaces
- Test for leaks with a clean rag
Seal and Gasket Issues
Seals and gaskets keep fluid inside your valve. If they wear out, you get leaks. Look for cracks, swelling, or hard spots on the seals. If a gasket feels brittle or thin, replace it. Sometimes, seals break down from heat or chemicals. You should check for discoloration or soft spots. If you see oil around the gasket, clean it and check for damage. Make sure the gasket sits flat and covers the whole surface. If you notice a gap, press it down or swap it out.
Let’s look at the most common causes of external leakage in hydraulic ball valves:
| Cause | Description |
|---|---|
| Seal Wear and Tear | Seals break down from heat, chemicals, or abrasives. This lets fluid escape. |
| Improper Installation | If you don’t tighten or align parts right, gaps form and leaks start. |
| Corrosion and Erosion | Fluids can eat away metal, making weak spots and leaks. |
| Pressure and Temperature Fluctuations | Extreme conditions make parts expand or shrink, hurting seal integrity. |
| Manufacturing Defects | Bad machining or faulty seals can cause leaks. Quality control matters. |
Note: If you find a damaged seal or gasket, replace it right away. Quick fixes help you avoid bigger problems later.
Signs of Oil Leaks
Oil leaks can sneak up on you. If you know what to look for, you can catch them early and stop bigger problems. Let’s talk about the most common signs that your hydraulic ball valve is leaking oil.
1. Wet or Shiny Surfaces
You might see oil on the outside of the valve. Sometimes, it looks like a shiny spot or a wet patch. Run your finger along the valve body, stem, and around the fittings. If your finger comes away oily, you probably have a leak.
2. Drips and Puddles
Look under the valve. Do you see drops of oil on the floor or on nearby equipment? Even a small puddle means oil is escaping. Place a piece of cardboard or a drip tray under the valve if you want to catch leaks early.
3. Stains and Discoloration
Oil can leave dark stains on metal, paint, or the floor. You might notice brown, black, or yellow marks. These stains often show up before you see a puddle. If you spot new stains, check the valve right away.
4. Oil Smell
Sometimes, you can smell oil before you see it. If the area around the valve smells stronger than usual, take a closer look. A strong oil odor often means a leak is nearby.
5. Low Fluid Levels
Check your hydraulic reservoir. If the oil level drops faster than normal, you might have a leak somewhere in the system. A sudden drop is a big warning sign.
6. Dust or Dirt Sticking to Oil
Oil leaks attract dust and dirt. If you see a sticky, dirty patch on the valve, that’s a clue. Clean valves should not have grime stuck to them.
Tip: Use a flashlight to check hard-to-see spots. Oil can hide in small cracks or behind fittings.
Here’s a quick checklist to help you spot oil leaks:
- Wet or shiny spots on the valve
- Drips or puddles under the valve
- Dark stains on the valve or floor
- Strong oil smell in the area
- Low oil level in the reservoir
- Sticky dirt patches on the valve
You can also use a simple table to track what you find:
| Sign | What It Means | What To Do |
|---|---|---|
| Wet surface | Fresh oil leak | Wipe and inspect |
| Drip or puddle | Ongoing leak | Find and fix source |
| Stain or discolor | Old or slow leak | Clean and monitor |
| Oil smell | Possible hidden leak | Inspect closely |
| Low fluid level | Leak somewhere in system | Check all valves |
| Sticky dirt | Oil attracting dust | Clean and check seal |
If you spot any of these signs, act fast. Clean the area, tighten fittings, or replace seals as needed. Early action keeps your system safe and saves you money.
Identifying Internal Leakage
Symptoms and Testing
Internal leakage in a hydraulic ball valve can sneak up on you. You might not see oil on the outside, but your system still loses pressure or acts strange. Here are some signs you should watch for:
- The system loses pressure even when all valves look closed.
- The actuator or cylinder moves slowly or drifts when it should stay still.
- You hear a faint hissing sound inside the valve.
- The pump runs more often than usual to keep up pressure.
- You notice a drop in system performance, like weak lifting or slow movement.
You can test for internal leaks by closing the valve and watching the pressure gauge. If the pressure drops when the valve should hold steady, you probably have a leak inside. Sometimes, you can also feel the valve body. If it feels warm when it should be cool, fluid might be slipping past the ball.
Tip: Always compare your system’s normal behavior to what you see now. Small changes can mean a leak is starting.
Shutoff Performance
A good ball valve should stop flow completely when you close it. If you notice fluid still moving or pressure dropping, the shutoff performance is not right. Here’s how you can check:
- Close the valve fully.
- Watch the downstream pressure gauge.
- If the pressure drops or you see movement, the valve is leaking inside.
You can also listen for noise. Sometimes, a leaking seat or worn seal makes a faint whistling or hissing sound. If you hear this, check the valve right away. You might need to replace the seats or seals to fix the problem.
A quick table helps you spot shutoff issues:
| Symptom | What It Means | What To Do |
|---|---|---|
| Pressure drops | Internal leak | Inspect seats/seals |
| Fluid keeps moving | Bad shutoff | Replace worn parts |
| Hissing sound | Leaking seat/seal | Check and repair |
Pressure Drop Checks
Pressure drop testing is a simple way to find internal leaks. You do not need fancy tools. Just use pressure gauges and follow these steps:
- Install pressure gauges on both sides of the ball valve.
- Close the valve completely.
- Apply pressure to one side.
- Watch both gauges.
If the pressure on the downstream side drops, fluid is leaking past the ball or seats. National standards set limits for how much pressure drop is okay. If your valve fails this test, you need to repair or replace it.
Here’s a quick checklist for pressure drop testing:
- Install gauges on both ends of the valve.
- Close the valve fully.
- Apply pressure to one side.
- Watch for pressure drop on the other side.
- Compare results to your standard.
Note: Pressure drop testing helps you catch leaks early. You keep your system safe and avoid bigger problems later.
Common Causes
You might wonder why a hydraulic ball valve starts leaking inside. Internal leakage can sneak up on you, but it usually happens for a few clear reasons. If you know what to look for, you can catch these problems early and keep your system running strong.
Here are the most common causes of internal leakage in hydraulic ball valves:
- Worn or Damaged Seats
The seats press against the ball to stop fluid from passing through. Over time, seats can wear out, crack, or get scratched by dirt in the fluid. When this happens, the valve cannot seal tight, and fluid slips past even when the valve is closed. - Debris or Contamination
Dirt, metal shavings, or other debris in your hydraulic fluid can get stuck between the ball and the seats. This stops the valve from closing all the way. Even a tiny piece of grit can cause a leak. Clean fluid is key to a leak-free valve. - Damaged Ball Surface
The ball inside the valve needs to be smooth. If it gets scratched, pitted, or corroded, it cannot make a good seal with the seats. This lets fluid leak through the closed valve. - Worn or Swollen Seals
Seals keep fluid from escaping around the ball and stem. If seals wear out, crack, or swell from the wrong fluid or high temperature, they lose their shape. This makes it easy for fluid to leak inside the valve. - Improper Installation or Assembly
If you do not install the valve correctly, the ball and seats might not line up. Misalignment can leave gaps where fluid can sneak through. Always follow the manufacturer’s instructions when you put in a new valve. - High Pressure or Water Hammer
Sudden spikes in pressure, called water hammer, can damage the seats or seals. High pressure can also force fluid past weak spots inside the valve. If your system has pressure surges, check your valves more often. - Valve Left Partially Open
Sometimes, the handle looks closed, but the ball is not fully turned. This leaves a small gap for fluid to leak through. Always double-check the handle position and make sure the valve is fully shut.
Here’s a quick table to help you remember the main causes and what they do:
| Cause | What Happens | What You Can Do |
|---|---|---|
| Worn seats | Fluid leaks past closed valve | Replace seats |
| Debris in fluid | Valve cannot seal | Filter and clean fluid |
| Damaged ball | Poor seal, leaks | Inspect and replace ball |
| Bad seals | Fluid escapes inside valve | Change seals |
| Wrong installation | Gaps let fluid pass | Reinstall correctly |
| High pressure surges | Seats/seals get damaged | Control pressure spikes |
| Valve not fully closed | Small leaks continue | Check handle position |
Tip: If you keep your fluid clean and check your valves often, you can stop most internal leaks before they start.
Knowing these common causes helps you fix leaks fast. You save time, money, and keep your hydraulic system safe.
Hard Valve Operation
High Pressure Effects
You might notice your hydraulic ball valve gets tough to turn when your system runs at high pressure. High pressure puts extra force on the ball and seats inside the valve. This makes the handle harder to move. Sometimes, you feel resistance or even hear a squeak. If you push too hard, you risk damaging the stem or handle. High pressure can also cause seals to swell or deform. When seals change shape, the valve gets sticky and tough to operate.
Here’s a quick tip:
If your valve feels stiff, check your system pressure first. Lowering the pressure before maintenance makes the job easier and safer.
A table helps you spot signs of high pressure problems:
| Sign | What It Means |
|---|---|
| Hard-to-turn handle | Pressure on ball/seats |
| Squeaking sounds | Seal stress |
| Swollen seals | Pressure deformation |
Contamination
Contamination can make your valve operation a real headache. Dirt, metal shavings, or water in your hydraulic fluid cause trouble fast. Abrasive particles scratch the ball and seats. This makes the valve harder to turn and shortens its life. Water in the system promotes corrosion and damages seals. You might notice sluggish response or leaks inside the valve. Contaminated fluid leads to more repairs and downtime. You spend more money fixing problems that clean fluid could prevent.
You want to keep your fluid clean. Use filters and check oil quality often. If you see cloudy oil or find debris during maintenance, flush the system and replace the oil. Clean fluid keeps your valve moving smoothly and helps it last longer.
Dirty fluid means more wear, more leaks, and more headaches. Keep your system clean for easy valve operation.
Corrosion
Corrosion sneaks up on you. It eats away at metal parts and makes the valve stick. You might see rust or pitting on the valve body, stem, or handle. Corrosion weakens the metal and can cause leaks. If you ignore rust, the valve gets harder to turn and may even break. Moisture in the system or water contamination speeds up corrosion. You want to check for rust every time you do maintenance.
Here’s a simple list to help you spot corrosion:
- Rust on valve body or handle
- Pitting on metal surfaces
- Stiff or sticky operation
If you find corrosion, clean the area and apply a protective coating. Replace parts if the damage is deep. Keeping your system dry and your fluid clean stops corrosion before it starts.
Don’t let corrosion ruin your valve. Regular checks and quick fixes keep your hydraulic system running strong.
Damaged Stem
You might notice your hydraulic ball valve feels tough to turn. Sometimes, the problem comes from a damaged stem. The stem connects the handle to the ball inside the valve. If the stem bends, cracks, or wears out, you lose smooth control. You may feel extra resistance or even hear a grinding sound.
Let’s look at some signs of stem damage:
- Handle feels loose or wobbly
- Valve won’t open or close all the way
- Grinding or squeaking noises when you turn the handle
- Visible cracks or bends on the stem
If you spot any of these signs, stop and check the stem right away. A damaged stem can lead to leaks or complete valve failure. You want to fix it before things get worse.
Tip: Always use the right tools when working on the stem. Using pliers or the wrong wrench can bend or damage the stem.
Here’s a quick table to help you spot stem problems:
| Symptom | What It Means | What To Do |
|---|---|---|
| Loose handle | Stem wear or damage | Inspect and replace |
| Hard to turn | Bent or cracked stem | Replace stem |
| Grinding noise | Stem or seat damage | Lubricate or repair |
If you find a damaged stem, replace it with a new one from the manufacturer. Don’t try to bend it back or patch it up. A fresh stem keeps your valve working smoothly.
Worn Seats and Seals
Seats and seals play a big role in how your ball valve works. The seats press against the ball to stop fluid from leaking. Seals keep fluid from escaping around the stem and body. If these parts wear out, you get leaks and hard operation.
You might notice these signs:
- Fluid leaks even when the valve is closed
- Handle feels sticky or tough to move
- Valve won’t shut off completely
- You see scratches or chips on the seats
Check the seats and seals every time you do maintenance. If you see wear, swap them out right away. Don’t wait for a big leak. Fresh seats and seals help your valve last longer.
Note: Use only seats and seals that match your valve’s specs. Wrong parts can cause more problems.
Here’s a simple checklist for seats and seals:
- Inspect for scratches or chips
- Replace if worn or damaged
- Lubricate new seals before installing
- Test valve after replacement
Seal Swelling
Seal swelling can make your valve hard to operate. Seals swell when exposed to the wrong fluid or high temperatures. Swollen seals press against the stem and ball, making the handle tough to turn. You might see seals that look bigger or feel soft and sticky.
Common causes of seal swelling:
- Using the wrong hydraulic fluid
- High heat in the system
- Chemical contamination
If you notice swollen seals, replace them with the right type for your system. Check your fluid and temperature limits. Keeping seals in good shape helps your valve move easily.
Alert: Swollen seals can lead to leaks and sudden valve failure. Always check seals during maintenance.
A quick table shows what to watch for:
| Cause | What Happens | Solution |
|---|---|---|
| Wrong fluid | Seals swell | Use correct fluid |
| High temperature | Seals deform | Lower system heat |
| Chemical exposure | Seals break down | Replace seals |
You keep your hydraulic ball valve running smooth by checking stems, seats, and seals often. Catching these problems early saves you time and money.
Installation Issues
You might not realize it, but how you install your hydraulic ball valve can make a huge difference in how easy it is to operate. If you rush the job or skip steps, you can end up with a valve that sticks, squeaks, or just refuses to turn. Let’s break down some common installation mistakes and how they affect your valve.
1. Misalignment
If you don’t line up the valve with the pipes, the stem and ball can get stuck. You might feel extra resistance when you try to turn the handle. Sometimes, the valve won’t open or close all the way. Always check the alignment before you tighten everything down.
2. Over-Tightening
You might think tighter is better, but that’s not always true. If you crank down the bolts too much, you can crush the seals or warp the valve body. This makes the handle hard to move and can cause leaks. Use a torque wrench and follow the manufacturer’s specs.
3. Wrong Mounting Position
Some valves need to sit in a certain direction. If you install the valve upside down or sideways, gravity can pull on the stem or ball. This makes operation tough and can wear out parts faster. Check the installation guide and make sure you mount the valve the right way.
4. Skipping Lubrication
If you forget to lubricate the stem or seats during installation, you set yourself up for trouble. Dry parts rub together and create friction. The handle gets stiff, and you might hear squeaks or grinding. Always use the recommended lubricant.
5. Using Wrong Tools
You need the right tools for the job. If you use pliers or the wrong wrench, you can bend the stem or damage the threads. This makes the valve hard to operate and can lead to leaks.
Here’s a quick table to help you spot installation issues:
| Installation Mistake | What Happens | How to Fix It |
|---|---|---|
| Misalignment | Sticking, hard operation | Realign pipes and valve |
| Over-tightening | Crushed seals, leaks | Use correct torque |
| Wrong mounting | Stiff handle, wear | Follow guide |
| No lubrication | Friction, squeaks | Lubricate parts |
| Wrong tools | Bent stem, leaks | Use proper tools |
Tip: Always read the installation instructions. Double-check your work before you start the system. A careful install saves you headaches later.
If you pay attention during installation, your valve will work smoothly. You avoid hard operation and keep your hydraulic system running strong.
Cleaning and Lubrication
Cleaning Procedures
You want your hydraulic ball valve to work smoothly every time. Cleaning is the first step. Dirt, old grease, and debris can build up inside the valve. If you let this happen, the valve can stick or even leak. You should clean both the outside and inside of the valve during every maintenance check.
Start by wiping down the outside with a clean rag. Remove any oil, dust, or grime. Next, look inside the ports. If you see dirt or sticky spots, use a soft brush or cloth to clean them out. For stubborn buildup, you might need a special cleaner. Some cleaners soften old lubricants and sealants. Others remove rust, wax, or varnish. You can even find cleaners that wash away without leaving anything behind.
Here’s a table to help you pick the right cleaner for your job:
| Type of Cleaner | Description |
|---|---|
| Hydrating Agent | Softens old lubricants and sealants; leave on for 4-12 hours for best results. |
| Heavy-Duty Cleaner | Removes rust, wax, varnish, and tough deposits; needs at least 4 hours to work. |
| Dispersing Valve Cleaner | Cleans thoroughly and rinses away easily; safe to use with water if needed. |
Tip: Always follow the instructions on the cleaner. Some need time to work. Others rinse off fast.
When you finish cleaning, dry all parts with a lint-free cloth. Make sure no cleaner stays inside the valve. This step helps you avoid problems when you add new lubricant.
Recommended Solvents
Picking the right solvent makes cleaning easier and safer. You want a solvent that removes dirt but does not harm the valve or seals. Mild solvents work best for most hydraulic ball valves. They clean away oil and debris without damaging rubber or plastic parts.
Here are some good choices for cleaning hydraulic valves:
- Use a mild, water-based solvent for general cleaning.
- Try isopropyl alcohol for light oil or grease.
- Pick a dispersing valve cleaner if you need to remove heavy buildup.
- Avoid harsh chemicals like acetone or strong acids. These can damage seals and seats.
Always test a small spot first. If you see swelling or color changes on seals, stop and pick a different solvent. After cleaning, rinse with clean water if the solvent allows. Dry all parts before you put the valve back together.
Note: Never use gasoline or paint thinner. These can break down seals and make the valve unsafe.
Lubricant Types
Lubrication keeps your ball valve moving smoothly. You want to use the right type of lubricant for your system. Not all lubricants work well with hydraulic valves. Some can even cause damage or block the valve.
Here are some tips for choosing the best lubricant:
- Always use lubricants made for hydraulic systems. These protect the valve and last longer.
- Pick a water-insoluble, synthetic, or oil-based lubricant. These types work well with most valve materials and handle tough conditions.
- Stay away from solid or clay-based lubricants. These can build up inside the valve and cause problems.
- Think about the temperature and pressure in your system. Make sure the lubricant matches these needs and works with your hydraulic fluid.
You want to follow lubrication best practices every time. This means using the right amount and type of lubricant. Too much or the wrong kind can cause sticky operation or even block the valve. Proper lubrication helps your valve last longer and work better.
Tip: Check your valve manual for the recommended lubricant. If you are not sure, ask the manufacturer.
When you use lubrication best practices, you keep your hydraulic ball valve in top shape. Clean, well-lubricated valves mean fewer breakdowns and smoother operation.
Lubrication Points
You want your hydraulic ball valve to move smoothly every time you use it. Lubrication helps you get that easy movement and keeps the valve from wearing out too soon. But you need to know exactly where to put the lubricant. If you miss a spot, you might still get squeaks or sticky operation. If you use too much, you can cause other problems.
Here are the main spots you should focus on:
- Valve Stem
The stem connects the handle to the ball inside the valve. You want to apply a thin layer of lubricant here. This helps the handle turn without sticking or grinding. - Stem O-Rings and Seals
O-rings and seals around the stem keep oil from leaking out. A small amount of lubricant on these parts helps them stay soft and flexible. This also makes it easier to turn the valve and keeps the seals from drying out. - Ball and Seats (if accessible)
Some valves let you reach the ball and seats during maintenance. If you can, add a light coat of lubricant here. This reduces friction between the ball and the seats, which helps the valve seal better and last longer. - Handle Pivot Points
The handle itself may have a pivot or hinge. A drop of lubricant here keeps the handle moving freely.
Tip: Always wipe away extra lubricant after you finish. You want just enough to cover the parts, not so much that it drips or collects dust.
A simple table can help you remember where to apply lubricant:
| Lubrication Point | Why It Matters | How Often to Lubricate |
|---|---|---|
| Valve Stem | Smooth handle movement | Every inspection |
| Stem O-Rings/Seals | Prevent leaks, keep seals soft | Every inspection |
| Ball and Seats | Reduce friction, better sealing | When accessible |
| Handle Pivot Points | Easy handle operation | Every inspection |
If you stick to these points, your valve will feel like new every time you use it.
Avoiding Over-Lubrication
You might think more lubricant is always better, but that’s not true for hydraulic ball valves. Too much lubricant can trap dirt, block small passages, or even damage seals. You want to use just the right amount in the right places.
Here’s how you can avoid over-lubrication:
- Select the Right Lubricant
Pick a lubricant made for hydraulic systems. Stay away from solid or clay-based products. These can clog up your valve and cause sticky movement. - Identify Lubrication Points
Focus only on the key areas like the stem and seals. Apply lubricant evenly and in small amounts. If you see extra squeezing out, you’ve used too much. - Follow Recommended Frequency
Check your valve’s manual for how often to lubricate. Stick to this schedule. If your system cycles a lot, you might need to lubricate more often, but don’t guess—always follow the guidelines.
Note: Wipe away any extra lubricant after you finish. Extra grease attracts dust and dirt, which can wear out your valve faster.
If you keep these steps in mind, you’ll get smooth operation without the mess. Your valve will last longer, and you’ll spend less time fixing problems.
Inspecting Handle, Stem, Seats, and Seals
Handle and Lock
You start your inspection with the handle and lock. The handle lets you control the valve. If it feels loose or sticks, you might have a problem. Try moving the handle from open to closed. It should turn smoothly. If you feel resistance or hear squeaks, you need to check for dirt or old grease.
Look at the lock next. The lock keeps the handle in place. If the lock slips or doesn’t hold, your valve could move when you don’t want it to. Check for any signs of wear or damage. If you see cracks or bends, replace the handle or lock right away.
Tip: Always test the handle and lock before you start the system. A strong handle and secure lock keep your valve safe.
Here’s a quick checklist for handle and lock inspection:
- Move handle through full range
- Check for smooth turning
- Inspect lock for security
- Look for cracks or bends
Stem Wear
The stem connects the handle to the ball inside the valve. If the stem wears out, you lose control. You want to check the stem every time you do maintenance. Look for signs of wear like scratches, grooves, or rust. If the stem feels rough or looks thin, it might be time to replace it.
Turn the handle and watch the stem. If it wobbles or feels loose, you could have a worn stem. Sometimes, you hear grinding or squeaking. That means the stem needs cleaning and fresh lubricant. If you see metal shavings near the stem, stop and inspect for damage.
Alert: A damaged stem can cause leaks or make the valve stick. Fix stem problems fast to avoid bigger issues.
Here’s a table to help you spot stem wear:
| Sign | What It Means | Action Needed |
|---|---|---|
| Scratches/Grooves | Wear or damage | Replace stem |
| Rust | Corrosion | Clean or replace |
| Wobble/Loose feel | Worn stem | Inspect, replace |
| Metal shavings | Internal damage | Stop, check stem |
Seat Condition
Seats press against the ball to stop fluid from leaking. If the seats wear out, you get leaks and poor shutoff. You want to inspect the seats during every maintenance check. Shine a light inside the valve if you can. Look for scratches, chips, or uneven surfaces.
If you see any damage, replace the seats right away. Damaged seats make the valve hard to operate and can cause leaks. Sometimes, you notice fluid leaking even when the valve is closed. That’s a sign the seats need attention.
Note: Clean seats help your valve seal tight. Always use seats that match your valve’s specs.
Here’s a simple list for seat inspection:
- Look for scratches or chips
- Check for uneven surfaces
- Replace damaged seats
- Test valve shutoff after replacement
You keep your hydraulic ball valve working well by checking the handle, stem, and seats often. These steps help you catch problems early and keep your system safe.
Seal Integrity
You want your hydraulic ball valve to stay leak-free and reliable. The seals inside the valve play a huge role in making that happen. If the seals break down, you can get leaks, sticky operation, or even a total valve failure. Checking seal integrity should always be part of your maintenance routine.
Start by looking for obvious signs of trouble. Do you see oil or fluid around the stem or body? That often means a seal is worn out or damaged. Sometimes, you might notice the handle feels harder to turn. Swollen or cracked seals can press against the stem and make movement tough. If you spot any of these warning signs, you need to act fast.
Here’s a simple checklist to help you inspect seal integrity:
- Look for leaks around the stem and body.
- Check for swelling, cracks, or flat spots on seals.
- Feel the handle. If it’s stiff, the seals might be swollen.
- Watch for changes in system pressure or performance.
- Listen for hissing or whistling sounds near the valve.
Tip: Always use a flashlight to check seals in hard-to-see spots. Oil can hide in small cracks or behind fittings.
You should also pay attention to the type of fluid in your system. Some hydraulic fluids can break down certain seal materials. If you recently changed fluids or noticed higher temperatures, check the seals more often. Swollen or soft seals often mean the wrong fluid is in use.
A quick table can help you spot seal problems and what to do next:
| Seal Problem | What You See or Feel | What To Do |
|---|---|---|
| Cracks or splits | Visible damage | Replace seals |
| Swelling or softness | Seals look bigger or feel mushy | Check fluid compatibility, replace seals |
| Flat spots | Seals don’t spring back | Install new seals |
| Leaks | Oil around stem or body | Tighten fittings, replace seals |
| Hard handle | Stiff movement | Inspect and lubricate seals |
When you replace seals, always use the right type for your valve and fluid. Lubricate new seals before you install them. This helps them seat properly and last longer. If you’re not sure which seal to use, check your valve manual or ask the manufacturer.
Note: Don’t ignore small leaks or sticky handles. Seal problems get worse over time. Fixing them early saves you money and keeps your system safe.
By checking seal integrity every time you do maintenance, you keep your hydraulic ball valve working like new. You avoid leaks, downtime, and expensive repairs. Make seal checks a habit, and your whole system will thank you.
Common Valve Maintenance Problems
External Leaks
You might spot external leaks before anything else goes wrong. These leaks usually show up around the valve stem or body. If you see slow drips near the handle, the packing material probably needs attention. Sometimes, you notice wet spots or stains on the valve body. That often means the valve has a structural problem or suffered physical damage.
Here’s what you should look for:
- Drips around the handle
- Wet spots on the valve body
- Stains or discoloration near fittings
If you find a leak, grab a rag and wipe the area clean. Watch for new drips. You can tighten the packing or replace it if needed. When you see leaks from the body, check for cracks or dents. You may need to replace the valve if the damage looks serious.
Tip: Keep a log of leaks. Write down where you found them and what you did. This helps you spot patterns and fix problems faster.
Internal Leaks
Internal leaks can sneak up on you. You won’t always see oil or fluid outside the valve. Instead, you notice the system loses pressure or the actuator moves when it shouldn’t. Internal leaks often happen when debris gets stuck between the ball and the seat. The valve fails to fully close, so fluid slips through.
Here are signs of internal leaks:
- Pressure drops when the valve should hold steady
- Actuator or cylinder drifts or moves slowly
- Valve fails to shut off completely
You can test for internal leaks by closing the valve and watching the pressure gauge. If the pressure drops, you probably have a leak inside. Sometimes, you hear a faint hissing sound. That means fluid is escaping past the ball or seat.
Note: Clean fluid helps prevent internal leaks. Use filters and check your oil often.
Hard Operation
Have you ever tried to turn a valve handle and felt like you needed extra muscle? Hard operation is a common problem. Scale buildup or overtightened packing can make the handle tough to move. Sometimes, you feel increased friction or hear squeaks. If you ignore this, you risk damaging the stem or handle.
Common causes of hard operation include:
- Scale or debris inside the valve
- Overtightened packing material
- Lack of proper lubrication
You can fix hard operation by cleaning the stem and adding fresh lubricant. If the handle still feels stiff, check for scale buildup. Remove any debris you find. Loosen the packing if it feels too tight, but don’t make it so loose that you get leaks.
Here’s a quick table to help you troubleshoot:
| Problem | What to Check | Solution |
|---|---|---|
| Hard-to-turn handle | Scale, packing, lube | Clean, lubricate, adjust packing |
| Valve won’t fully close | Debris in seat | Clean seat, flush fluid |
| Drips around handle | Packing material | Replace or tighten packing |
Tip: If you hear squeaks or grinding, stop and check the valve. Quick fixes keep your system running smooth.
Most Common Maintenance Problems
You’ll run into these issues most often:
- Valve fails to fully close because debris blocks the ball and seat
- Leaks from the valve stem due to worn packing
- Leaks from the valve body caused by damage or bad assembly
- Difficult-to-turn handle from scale buildup or tight packing
- Vibrating or noisy valve signaling internal trouble
Stay alert for these problems. Regular checks and quick repairs help you avoid downtime and keep your hydraulic ball valves working their best.
Corrosion
Corrosion can sneak up on you and cause trouble fast. You might see rust, pitting, or discoloration on your hydraulic ball valve. These signs mean water or chemicals are attacking the metal. If you ignore corrosion, your valve can stick, leak, or even break. You want to catch it early and fix it before it spreads.
You should check for corrosion every time you do maintenance. Look at the valve body, stem, and handle. Use a flashlight to spot hidden rust or rough spots. Feel the metal. If it feels gritty or bumpy, corrosion has started. Sometimes, you see white powder. That means aluminum or zinc parts are breaking down.
Here’s what you can do if you find corrosion:
- Clean the area with a wire brush or approved solvent.
- Dry the valve with a lint-free cloth.
- Apply a protective coating if your system allows it.
- Replace parts if the damage is deep or the valve feels weak.
Tip: If you see rust, check for leaks nearby. Moisture often causes both problems.
Corrosion can happen for several reasons. Maybe water got into the system. Sometimes, the hydraulic fluid breaks down and attacks the metal. You might have used the wrong cleaning solvent or left the valve exposed to harsh weather.
Let’s look at a table that shows common causes and solutions:
| Cause | What You See | What To Do |
|---|---|---|
| Water contamination | Rust, pitting | Dry system, fix leaks |
| Bad fluid | Discoloration, soft spots | Change fluid, clean valve |
| Harsh chemicals | White powder, rough metal | Use safe cleaners, replace parts |
| Weather exposure | Rust, faded paint | Protect valve, repaint |
You can prevent corrosion by keeping your system dry and using clean fluid. Always store spare valves in a dry place. If you work outside, cover the valves when not in use. Check seals and gaskets often. They keep water and dirt out.
Alert: Don’t ignore small rust spots. Corrosion spreads fast and can ruin your valve.
If you stay alert and act quickly, you keep your hydraulic ball valves strong and reliable. Regular checks and simple fixes help you avoid big repairs and keep your system running smooth.
Repair or Replace?
Repairable Issues
You can fix many problems with a hydraulic ball valve. Sometimes, you see a small leak or the handle is hard to move. These problems often happen because seals are worn out, fittings are loose, or dirt got inside. If you find these problems early, you can repair the valve and keep things working.
Here are some signs your valve just needs a simple fix:
- Seals or O-rings are leaking
- Handle is stiff but works after cleaning and oiling
- Small rust spots on the body or stem
- Bolts or nuts are loose
You can change seals, tighten parts, and clean the valve. These repairs do not cost much and do not take long. You do not have to stop your whole system for a long time. If you do regular checks, you can stop bigger problems from happening.
Tip: Look at your maintenance records. If you only fixed the valve a few times, it is smart to repair it.
When to Replace
Sometimes, fixing the valve is not enough. You should think about getting a new valve if problems keep coming back or the valve is very worn out. If you spend more time fixing than using the valve, it is better to replace it.
Here is a table to help you decide:
| Criteria | Indication for Replacement | Indication for Repair |
|---|---|---|
| Condition of the valve | Very rusty or breaks a lot | Small problems like leaking seals |
| Frequency of repairs | Needs fixing a lot or all the time | Only needs fixing sometimes |
| Cost-effectiveness | Costs more to keep fixing it | Cheaper to repair small problems |
If your valve is very rusty or keeps breaking, you waste money and time fixing it. If you see leaks, hard-to-move handles, or the valve keeps failing, you should get a new one. This saves money and stops surprise breakdowns.
Note: If you see your repair costs going up, getting a new valve helps your system work better.
Severe Damage
Some problems are too big to fix. If the valve is badly damaged, it is not safe or good to use. If you see cracks, deep rust, or broken parts, you cannot repair it. Sometimes, the valve stops working during use and causes leaks or loss of control. These problems can be dangerous for your equipment and team.
Here are signs the valve is too damaged:
- Valve body is cracked
- Handle or stem is broken
- Deep rust or holes
- Valve will not stop flow
If you see these problems, you need a new valve right away. Do not try to fix a badly damaged valve. A new valve keeps everyone safe and stops bigger problems.
Alert: Always get a new valve if you see bad damage. Safety is most important.
Persistent Leaks
You might fix a leak once and think the problem is gone. But sometimes, leaks keep coming back. These are called persistent leaks. They can drive you crazy and waste your time. You patch the valve, tighten the fittings, or swap out a seal, but the leak returns after a few days or weeks.
Why do these leaks keep happening? Here are some common reasons:
- The valve body has a hidden crack.
- The seats or seals do not fit right.
- The stem is bent or worn out.
- The fluid attacks the seal material.
- The valve was installed wrong.
You can try to repair a persistent leak, but you need to know when to stop. If you keep fixing the same leak, you lose time and money. Your system might even shut down at the worst moment.
Alert: If you fix a leak more than twice and it comes back, it is time to think about replacing the valve.
Let’s look at some signs that a leak will not go away with simple repairs:
| Sign of Persistent Leak | What It Means | What You Should Do |
|---|---|---|
| Leak returns after repair | Deeper problem inside the valve | Inspect for cracks or wear |
| Oil stains keep growing | Valve body or seat is damaged | Replace the valve |
| Multiple leaks at once | Valve is worn out | Replace the valve |
| Seals fail quickly | Wrong seal material or rough surface | Check compatibility, replace valve |
You want your hydraulic system to run without surprises. Persistent leaks can cause big messes, safety risks, and even damage other parts. If you see oil on the floor every week, your valve is telling you it is done.
Here’s what you can do when you face a leak that will not quit:
- Check your maintenance records. See how many times you fixed the same spot.
- Inspect the valve body for cracks or deep rust.
- Look at the seats and seals. If they wear out fast, the valve might be out of shape.
- Ask yourself if the valve is old or has been in a tough spot for years.
- Talk to your team or the valve maker. Sometimes, you need a new design or better material.
Tip: Do not wait for a small leak to turn into a big spill. Replacing a problem valve saves you time, money, and stress.
You do not have to fight the same leak over and over. If repairs do not last, choose a new valve. Your hydraulic system will thank you.
Extending Valve Service Life
Regular Maintenance
You want your hydraulic ball valve to last as long as possible. Regular maintenance is your best tool for making that happen. When you check your valve often, you catch small problems before they turn into big ones. You can spot leaks, worn seals, or loose handles early. This helps you fix things fast and avoid costly breakdowns.
Here’s what you should do during regular maintenance:
- Clean the valve body and ports to remove dirt and grime.
- Lubricate moving parts like the stem and handle. This keeps everything moving smoothly.
- Inspect seals and O-rings for cracks or swelling.
- Tighten bolts and connections to stop leaks.
- Test the valve by opening and closing it a few times. Listen for squeaks or grinding.
You should also keep a maintenance log. Write down what you check and what you fix. This helps you see patterns and plan future work. Regular maintenance keeps your valve working like new and saves you money in the long run.
Clean Fluid
Clean fluid is key to a long-lasting hydraulic ball valve. Dirty oil can carry grit and metal shavings that scratch the ball and seats. This leads to leaks and hard operation. You want to use the right hydraulic fluid for your system. Always pick a fluid that the manufacturer recommends. This protects your seals and keeps them from breaking down.
Set up a fluid testing program. Check your oil for dirt, water, or other problems. Change the oil if it looks cloudy or smells burnt. Install high-quality filters to catch debris before it reaches your valve. Replace filters on schedule to keep them working well.
Here’s a quick checklist for clean fluid:
- Use manufacturer-recommended hydraulic fluid.
- Test fluid quality on a regular schedule.
- Change oil when it gets dirty or old.
- Install and maintain good filters.
Clean fluid means fewer repairs and a longer life for your valve.
Proper Installation
Proper installation makes a big difference in how long your valve lasts. If you rush or skip steps, you might end up with leaks or a valve that is hard to turn. Always follow the instructions from the manufacturer. Make sure the valve lines up with the pipes. Tighten bolts to the right torque. Do not over-tighten, or you could crush the seals.
Check the mounting position. Some valves need to sit a certain way. If you install the valve upside down or sideways, it might wear out faster. Lubricate the stem and seats before you put the valve together. This helps everything move smoothly from the start.
Here’s a table to help you remember the key steps:
| Step | Why It Matters |
|---|---|
| Align valve properly | Prevents sticking and leaks |
| Use correct torque | Protects seals and threads |
| Lubricate parts | Reduces friction and wear |
| Check mounting | Ensures smooth operation |
When you install your valve the right way, you set it up for a long, trouble-free life.
Rated Operation
You want your hydraulic ball valve to last as long as possible, right? One of the best ways to do that is to always use it within its rated limits. Every valve comes with a pressure and temperature rating from the manufacturer. These numbers tell you how much pressure and heat the valve can handle safely. If you push your valve past these limits, you risk damage, leaks, or even a sudden failure.
Let’s break it down. When you run your valve at higher pressure than it’s rated for, the seals and seats wear out faster. The ball can get scratched or dented. You might even see the valve body start to bulge or crack. High temperatures can make seals swell or break down. Cold temperatures can make parts stiff or brittle. If you ignore these ratings, you end up with more repairs and a shorter valve life.
Here’s a quick table to help you remember what to check:
| Rated Limit | What to Watch For | What Can Happen |
|---|---|---|
| Pressure | System gauge readings | Leaks, burst seals |
| Temperature | Valve surface feels hot/cold | Swollen or cracked seals |
| Flow Rate | Unusual noise or vibration | Erosion, internal wear |
Tip: Always check the valve’s tag or manual for the correct ratings. If you’re not sure, ask the manufacturer before you turn up the pressure or temperature.
You can keep your valve safe by following a few simple steps:
- Check your system’s pressure and temperature gauges every day.
- Compare your readings to the valve’s rated limits.
- If you see numbers getting close to the max, slow down or shut off the system.
- Never use a valve for a job it wasn’t designed for. For example, don’t use a low-pressure valve in a high-pressure system.
- Replace any valve that shows signs of bulging, cracking, or leaking.
Sometimes, you might want to get more out of your system. Maybe you think a little extra pressure will help things move faster. Don’t do it! Running above the rated operation might work for a short time, but it always leads to trouble. You’ll spend more time fixing leaks and replacing valves.
Note: If you upgrade your hydraulic system, make sure your valves match the new specs. Using the wrong valve can cause big problems.
Rated operation isn’t just about following rules. It’s about keeping your equipment safe and your team out of harm’s way. When you stick to the ratings, your valve lasts longer, and you avoid surprise breakdowns. That means less downtime and more peace of mind for you.
Maintenance Mistakes to Avoid
Maintenance Under Pressure
You might feel tempted to fix a valve while the system is still pressurized. Maybe you think it will save time. This is one of the biggest mistakes you can make. Working on a pressurized hydraulic system is dangerous. You risk sudden fluid release, which can cause injury or damage equipment. Even a small leak can spray oil at high speed. That can cut skin or get in your eyes.
Always depressurize the system before you start any maintenance. Turn off the pump. Open the bleed valves. Wait until the pressure gauge reads zero. Double-check with your hand—pipes should feel cool and quiet. Never rush this step. Safety comes first.
Alert: Never trust a valve to hold back pressure by itself. Always isolate and depressurize the line before you touch the valve.
Wrong Tools or Lubricants
Using the wrong tool can turn a simple job into a big problem. If you grab pliers instead of a wrench, you might round off bolts or damage the valve stem. Damaged parts make leaks more likely. You also risk hurting yourself if a tool slips.
Pick the right tool for each job. Use a torque wrench for bolts. Choose the correct size for nuts and fittings. If you are not sure, check the valve manual or ask your supervisor.
Lubricants matter, too. Not all greases or oils work with hydraulic valves. Some can break down seals or clog small passages. Always use a lubricant made for hydraulic systems. Avoid clay-based or solid greases. These can cause sticky operation or even block the valve.
Here’s a quick table to help you remember:
| Mistake | What Can Happen | What To Use Instead |
|---|---|---|
| Pliers on bolts | Rounded heads, leaks | Correct size wrench |
| Wrong lubricant | Seal damage, sticking | Hydraulic-grade lubricant |
| Overly thick grease | Blocked passages | Light, synthetic oil |
Tip: Keep a set of proper tools and approved lubricants in your maintenance kit. This saves time and prevents mistakes.
Over-Tightening
You might think tighter is always better. That is not true for hydraulic ball valves. Over-tightening bolts or fittings can crush seals, warp the valve body, or strip threads. This leads to leaks and hard operation. Sometimes, you even break the valve.
Use a torque wrench and follow the manufacturer’s specs. Tighten bolts in a crisscross pattern for even pressure. If you feel resistance before reaching the recommended torque, stop and check for dirt or misalignment.
- Tighten bolts to the correct value.
- Never force a fitting if it does not turn easily.
- Replace damaged threads right away.
Note: Over-tightening causes more problems than it solves. Trust your tools and the specs. Your valve will last longer and work better.
Ignoring Warning Signs
You might think a small leak or a sticky handle is no big deal. Maybe you hear a strange noise and hope it goes away. Ignoring these warning signs is one of the biggest mistakes you can make with hydraulic ball valves. Problems rarely fix themselves. If you overlook early clues, you risk bigger failures, costly repairs, and even safety hazards.
Let’s talk about the most common warning signs you should never ignore:
- Leaks: Even a tiny drip means something is wrong. Leaks can get worse fast and lead to system shutdowns.
- Hard-to-turn handle: If the handle feels stiff or squeaks, you could have dirt, corrosion, or worn parts inside.
- Unusual noises: Whistling, banging, or rattling sounds often signal loose fittings or internal damage.
- Pressure drops: If your gauge shows lower pressure than usual, you might have an internal leak or blockage.
- Visible rust or corrosion: Rust spreads quickly and weakens the valve. You need to act before it causes a break.
- Frequent actuator cycling: If the actuator runs more often, your valve may not be sealing properly.
Alert: Don’t wait for a small problem to turn into a big disaster. Early action saves money and keeps your system safe.
Here’s a quick table to help you spot trouble:
| Warning Sign | What It Means | What You Should Do |
|---|---|---|
| Leak or drip | Seal or fitting issue | Inspect and repair |
| Stiff handle | Internal wear or dirt | Clean and lubricate |
| Strange noise | Loose or damaged part | Tighten or replace |
| Pressure drop | Internal leak/blockage | Test and fix |
| Rust/corrosion | Metal damage | Clean or replace |
You can use a simple checklist to stay on top of warning signs:
- Check for leaks every inspection
- Test handle movement
- Listen for new noises
- Watch pressure gauges
- Look for rust or stains
If you notice any of these signs, don’t ignore them. Write them down in your maintenance log. Fix the issue right away or schedule a repair. You keep your hydraulic system running strong by paying attention to warning signs. Your quick response prevents downtime and protects your equipment.
Ordering Replacement Valves
Pressure Rating
You want your new hydraulic ball valve to handle the pressure in your system. If you pick the wrong pressure rating, you risk leaks or even a burst valve. Always check your system’s maximum working pressure before you order a replacement. Look at the pressure rating on your old valve or in your system manual. If you are not sure, ask your maintenance team or the manufacturer.
Here’s a quick tip:
Always choose a valve with a pressure rating equal to or higher than your system’s max pressure. Never guess or “go close enough.” Safety comes first.
You can use a table to compare common pressure ratings:
| Valve Series | Max Pressure (psi) | Typical Use |
|---|---|---|
| Standard | 3,000 | General hydraulics |
| High-Pressure | 6,000 | Heavy equipment |
| Ultra-High | 10,000+ | Special applications |
If your system has pressure spikes, pick a valve with a higher rating. This helps you avoid sudden failures.
Connection Type
You need the right connection type for your pipes or hoses. Ball valves come with different ends, like threaded, flanged, or welded. Check what you have now. If you order the wrong connection, the valve will not fit, and you will waste time and money.
Here are some common connection types:
- Threaded: Screws onto pipe ends. Easy to install and replace.
- Flanged: Bolts between pipe flanges. Good for larger sizes or high pressure.
- Welded: Welds directly to the pipe. Best for permanent setups and zero leaks.
Take a look at your current valve. Snap a photo or write down the size and type. If you are not sure, bring the old valve to your supplier or send a picture.
Tip: Double-check the thread size and type (NPT, BSP, etc.). Even a small mismatch can cause leaks.
Material and Seals
You want your replacement valve to last. The material and seals matter a lot. Different fluids and temperatures need different materials. Most hydraulic ball valves use stainless steel, carbon steel, or brass. Stainless steel resists rust and works well with water-based fluids. Carbon steel is strong and good for oil-based systems. Brass works for low-pressure or special fluids.
Seals keep the fluid inside. Common seal materials include NBR (nitrile), FKM (Viton), and PTFE (Teflon). Each one works best with certain fluids and temperatures.
Here’s a simple table to help you choose:
| Material | Best For | Not Good For |
|---|---|---|
| Stainless | Water, harsh fluids | Very high pressure |
| Carbon Steel | Oil, high pressure | Corrosive fluids |
| Brass | Low pressure, special fluids | High pressure, strong chemicals |
| Seal Type | Good With | Max Temp (°F) |
|---|---|---|
| NBR | Oil, water | 212 |
| FKM | Chemicals, high temp | 400 |
| PTFE | Most fluids | 450 |
If you are not sure what to pick, ask your supplier or check your system specs. The right material and seal keep your valve working longer and stop leaks.
Application Details
You want your new hydraulic ball valve to fit your system perfectly. To make that happen, you need to share the right application details when you order. If you skip this step, you might get a valve that does not work well or wears out too fast.
Start by thinking about how you use the valve. Ask yourself a few questions:
- What kind of fluid runs through the valve? Is it oil, water, or something else?
- How hot or cold does your system get?
- How much pressure does the valve need to handle?
- How often do you open and close the valve each day?
- Does the valve need to work in a clean room, outside, or in a place with lots of dust?
You can write down your answers and share them with your supplier. This helps them pick the best material and seals for your job. For example, if you use the valve with water, stainless steel works better than carbon steel. If your fluid is a special chemical, you might need a special seal.
Tip: The more details you give, the better your new valve will fit your needs.
Here’s a simple table to help you organize your application details:
| Detail to Share | Why It Matters | Example |
|---|---|---|
| Fluid Type | Picks the right material and seal | Hydraulic oil, water, glycol |
| Temperature Range | Stops seal swelling or cracking | -20°F to 180°F |
| Pressure Range | Makes sure valve can handle the load | 3,000 psi |
| Cycle Frequency | Helps choose a valve for heavy use | 50 cycles per day |
| Environment | Prevents rust or dirt problems | Outdoor, dusty, clean room |
| Special Requirements | Handles unique needs | Fire-safe, anti-static |
Don’t forget to mention any rules or standards your plant follows. Some places need valves that meet ISO, CE, or other codes. If you have a drawing or a photo of your old valve, share that too. It helps your supplier see exactly what you need.
If you give clear application details, you save time and money. You avoid returns, delays, and extra repairs. You also get a valve that lasts longer and keeps your system safe.
Need help? Ask your supplier for a checklist. They can guide you through the process and make sure you don’t miss anything.
Conclusion
Regular hydraulic ball valve maintenance helps prevent leaks, reduce unexpected downtime, and keep your hydraulic system safe and reliable. Follow a clear maintenance schedule, record inspection results, and replace worn parts when necessary. Proper maintenance can extend valve service life, improve system performance, and lower long-term operating costs.
Chenyang Hydraulic is a professional hydraulic ball valve manufacturer in China. We manufacture standard and custom hydraulic ball valves for a wide range of industrial applications. If you need help with valve selection, maintenance, materials, pressure ratings, or custom specifications, contact our team for technical support and a solution based on your system requirements.
FAQ
How often should you check a hydraulic ball valve?
You should check your valve at least once a month. If your system runs under high pressure or gets dirty often, check it more. Regular checks help you catch problems early.
What signs show a ball valve needs maintenance?
Look for leaks, hard-to-turn handles, strange noises, or rust. If you see oil stains or feel resistance, your valve needs attention. Don’t ignore these warning signs.
Can you lubricate a hydraulic ball valve yourself?
Yes, you can. Use the right lubricant for your valve. Apply a thin layer to the stem and seals. Wipe away extra grease. Always follow the manufacturer’s instructions.
What causes a valve handle to get stuck?
Dirt, rust, or worn seals can make the handle stick. High pressure or wrong installation also cause problems. Clean and lubricate the valve to fix most issues.
How do you stop leaks in a hydraulic ball valve?
Tighten loose fittings first. Replace worn seals or O-rings. Clean the valve and check for cracks. If leaks keep coming back, you may need a new valve.
Is it safe to repair a valve while the system is pressurized?
No, it’s not safe. Always turn off the system and release all pressure before you start repairs. This step keeps you and your equipment safe.
What tools do you need for valve maintenance?
You need a torque wrench, screwdrivers, clean rags, and the right lubricant. Sometimes, you need a flashlight or a small brush. Use the correct tools to avoid damage.
When should you replace a hydraulic ball valve?
Replace the valve if you see cracks, deep rust, or leaks that won’t stop. If you fix the same problem more than twice, it’s time for a new valve.