
You size a check valve by matching it to your system’s real flow and pressure, not just the pipe size. Picking the right size keeps your equipment safe and helps things work well. If you choose a valve only by pipe size, you might get chattering, fluttering, or early failure. Many people pick valves that are too big, which can make the disc move too much and wear out quickly. Always make sure there is enough space, figure out the pressure, and remember that check valves work because of flow. This guide will show you how to size a check valve the right way.
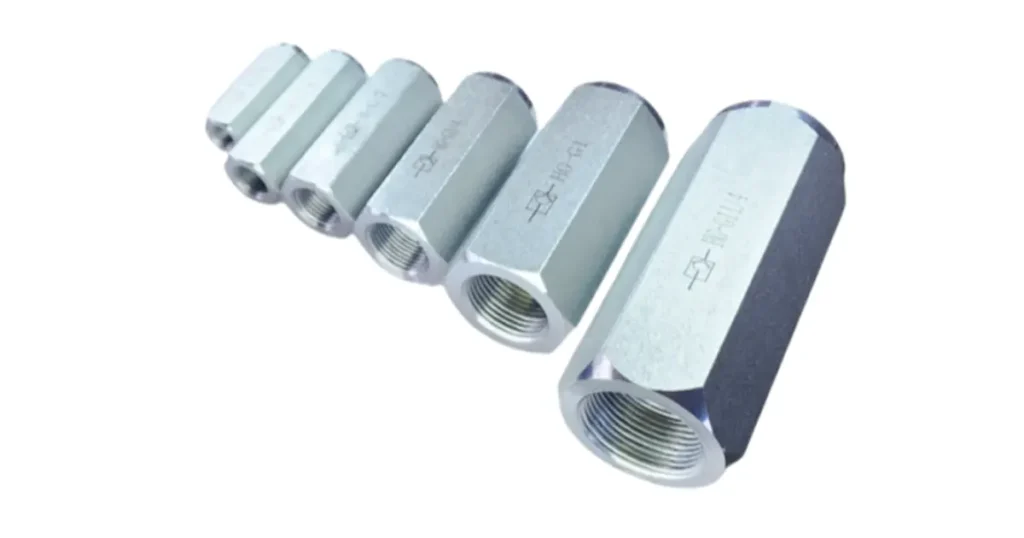
Key Takeaways
- Check valve sizing means matching the valve to your system’s flow and pressure. It is not just about the pipe size.
- Oversized valves can make noise. They can also leak and wear out too soon. Pick the right size to stop these problems.
- Know your system’s flow rate and pressure drop. This helps you pick the right valve.
- Think about the fluid type and viscosity. Different fluids need different valve sizes and materials.
- Always check the valve’s cracking pressure. This makes sure the valve opens and closes right.
- Gather all system details before sizing a check valve. This includes flow rates, pressure, and connection types.
- Look at manufacturer data to check your valve choice. This step helps you avoid mistakes and keeps things safe.
- Check your check valve often for wear or leaks. Finding problems early can save you time and money.
What Is Check Valve Sizing
Check valve sizing means picking a valve that matches your system’s real needs, not just the pipe size. You want your check valve to fit the flow and pressure in your line. If you get this right, your system runs smoother and lasts longer.
Valve Size vs. Pipe Size
You might think you can just match the valve size to your pipe size. That sounds easy, but it often leads to problems. Here’s why:
- Proper sizing of check valves is essential for optimal performance and longevity.
- Sizing involves understanding flow characteristics, pressure drop, and specific application requirements.
- Oversizing can lead to inefficiencies and unnecessary specifications.
If you pick a valve that’s too big, it might not close properly. The disc can move too much and wear out fast. If you pick one that’s too small, you can choke the flow and cause high pressure drops. Both mistakes can hurt your equipment.
Let’s look at what you need to check besides pipe size:
- Flow Rate: You need to know how much fluid moves through your system at its busiest.
- Pressure Drop: You want to keep this low so your pump or system doesn’t work too hard.
- Application Needs: Some systems need special valves for certain fluids or temperatures.
So, when you ask how to size a check valve, remember it’s not just about matching the pipe. You need to look at the whole picture.
Flow Capacity and Port Area
The size of the opening inside the valve, called the port area, controls how much fluid can pass through. Bigger valves have larger port areas, which means more flow and less pressure loss. But bigger isn’t always better.
Here’s a quick look at how valve size, port area, and flow work together:
| Factor | Description |
|---|---|
| Valve Size | Larger valves have a greater flow area, reducing pressure losses and allowing for higher flow rates. |
| Flow Area | As valve size increases, the flow area increases, leading to a higher maximum flow capacity. |
| Pressure Losses | Generally decrease with larger valves, enhancing overall flow performance. |
| Flow Coefficient (Cv) | A higher Cv means more flow can pass with less restriction. |
If you choose a valve with a port area that’s too small, you’ll get high pressure drops and slow flow. If the port area is too big, the valve might not close tightly, which can cause leaks or wear.
Tip: Always check the flow capacity (Cv) and make sure it matches your system’s needs. Don’t just guess based on pipe size.
When you know how to size a check valve, you can avoid common mistakes and keep your system running strong.
Why Sizing Matters
Sizing a check valve isn’t just about matching numbers. You protect your system and keep everything running smoothly when you get it right. If you pick the wrong size, you can run into big problems that cost time and money.
Risks of Incorrect Sizing
Oversized Valve Issues
When you choose a valve that’s too big, you might think you’re playing it safe. Actually, you’re setting yourself up for trouble. Oversized valves often don’t close tightly. The disc inside can move too much, which causes chattering and premature wear. You’ll hear rattling noises and see the valve wearing out faster than expected. Sometimes, the valve won’t seal well, so you get leaks or reverse flow. This can damage pumps and other equipment.
Oversized valves can create noise, vibration, and even water hammer. Water hammer is a loud banging sound in your pipes. It happens when the valve slams shut because it’s too big for the flow. This shock can break pipes or cause expensive repairs.
Undersized Valve Issues
Picking a valve that’s too small can choke your system. You’ll see high pressure drops, which means your pump has to work harder. The flow slows down, and you might not get enough fluid where you need it. If the valve is too small, it can stick or fail to open fully. Sometimes, the valve blocks the flow completely. When this happens, your pump runs at maximum pressure but no fluid moves. This can cause overheating, seal failures, and even ruptures in your piping—especially if you’re dealing with hot or dangerous fluids.
| Problem | Oversized Valve | Undersized Valve |
|---|---|---|
| Chattering | Yes | Sometimes |
| Noise/Vibration | Yes | Yes |
| High Pressure Drop | Rare | Common |
| Flow Blockage | Rare | Possible |
| Premature Wear | Yes | Yes |
Common Symptoms
You can spot incorrect check valve sizing by watching for these signs:
- High pressure drops
- Chatter or rattling noises
- Insufficient flow
- Water hammer (loud banging)
- Vibration or shaking pipes
- Reverse flow or leaks
- Sticking or sluggish movement
If you notice any of these symptoms, your check valve might not be sized right. You need to look at how to size a check valve properly to avoid these headaches. Getting the size right keeps your system safe, efficient, and quiet.
Information Needed Before Sizing
Before you start sizing a check valve, you need to gather all the important details about your system. If you skip this step, you might end up with a valve that doesn’t work right or wears out too fast. Let’s break down what you need to know.
Flow Rate and Pressure
You always want to know how much fluid moves through your system and how much pressure pushes it. These numbers help you pick a valve that opens and closes at the right time. If you guess or use rough estimates, you risk problems like chattering or fluttering. That’s when the valve moves back and forth quickly, making noise and wearing out faster.
Here’s why accurate flow rate and pressure matter:
- You make sure the valve operates effectively.
- Low flow can cause the valve to chatter or flutter, which leads to more maintenance.
- If the valve is too big, it might not stay open because the flow isn’t strong enough.
- If the valve is too small, you get high pressure loss and turbulence. That means more wear and tear.
Tip: Write down your maximum and minimum flow rates. Check your system’s pressure at different points. This helps you avoid costly mistakes.
Fluid Type and Viscosity
The kind of fluid you use changes everything. Water, oil, chemicals, and gases all behave differently. You need to know if your fluid is thick or thin. Viscosity tells you how sticky or runny the fluid is. Thick fluids, like oil, need bigger valves to move at the same speed as thin fluids, like water.
Think about these points:
- Check the fluid’s density and viscosity before picking a valve and spring.
- More viscous fluids need larger valves for the same flow rate.
- Always evaluate fluid density and viscosity when choosing check valves.
If you ignore viscosity, your valve might not open or close as it should. You could see slow movement or even blockages.
Temperature and Media
Temperature changes how fluids act. Hot fluids flow faster because they get thinner. Cold fluids move slower because they get thicker. You need to know your system’s temperature range so you can pick the right valve material and size.
Consider these facts:
- High temperatures lower viscosity, making flow easier.
- Low temperatures raise viscosity, which can cause operational issues.
- Valve materials must handle temperature swings to stay strong and reliable.
Note: If your system runs hot or cold, check the valve’s material rating. Some materials break down or lose strength in extreme temperatures.
When you collect all this information—flow rate, pressure, fluid type, viscosity, and temperature—you set yourself up for success. You avoid common sizing mistakes and keep your system running smoothly. Don’t skip this step. It’s the foundation for picking the right check valve.
Pipe Size and Connection
You might think pipe size is the most important detail when picking a check valve. It’s a good starting point, but you need more than just the diameter. You have to check the connection type, too. Does your system use threaded, flanged, or welded connections? Each style fits differently and affects how you install the valve.
Here’s a quick checklist for pipe size and connection:
- Match the valve size to your pipe, but double-check the flow requirements.
- Pick the right connection type for your system. Threaded connections are easy to install. Flanged connections work well for larger pipes. Welded connections give you a strong, leak-proof seal.
- Make sure you have enough space for the valve and tools. Some valves need extra room for maintenance.
Tip: Don’t just grab a valve that fits your pipe. Look at the connection style and installation space. This saves you headaches later.
Cracking Pressure and Position
Cracking pressure is a key detail in check valve sizing. It tells you the minimum pressure needed to start flow through the valve. If you pick a valve with cracking pressure that’s too high, your system might not push enough fluid to open it. You’ll see chattering, noise, and fast wear. If the cracking pressure is too low, the valve may not close tightly. That can cause leaks and let fluid flow backward.
You need to know the cracking pressure for your system. It’s usually listed in the valve specs. The valve’s internal design must match your needs. If you get this right, your valve opens and closes at the right time. Your system stays safe and efficient.
Position matters, too. Where you place the valve affects how it works. If you install it in a spot with low pressure, the valve might not open. If you put it where pressure changes a lot, the valve could chatter or wear out. Always check the pressure at the installation point.
| Factor | Why It Matters |
|---|---|
| Cracking Pressure | Ensures valve opens and closes properly |
| Valve Position | Affects flow and valve operation |
Duty Cycle and Variation
You need to think about how often your valve opens and closes. That’s called the duty cycle. Some systems run all day, while others only operate once in a while. If your valve cycles a lot, it needs to be tough. Frequent cycling can wear out springs and seals.
Variation is another thing to watch. Does your system have steady flow, or does it change a lot? If flow rates swing up and down, your valve needs to handle those changes. Pick a valve that works well at both high and low flows.
Note: Write down how often your valve will cycle and how much your flow changes. This helps you choose a valve that lasts longer and works better.
When you gather all these details—pipe size, connection, cracking pressure, position, duty cycle, and variation—you set yourself up for a reliable system. You avoid common mistakes and keep your equipment running smoothly.
Why Pipe Size Alone Isn’t Enough
You might think picking a check valve is as simple as matching it to your pipe size. That sounds easy, but it can cause big problems in your system. Let’s break down why pipe size isn’t the only thing you need to consider.
Pipe vs. Valve Sizing
Pipe size tells you how wide your pipes are, but it doesn’t tell you how your check valve will work. Check valves don’t just sit in the pipe—they react to flow and pressure. If you choose a valve based only on pipe size, you risk making your system less efficient.
ASHRAE standards sometimes allow pipe sizes that go past the velocity limit for check valves. This means your pipe might be fine, but your valve could struggle. When you pick a valve just because it matches the pipe, you can end up with a valve that’s too big. Oversized valves often don’t open all the way during normal flow. This hurts performance and wastes money.
Check valves need the right flow velocity and pressure difference to work well. If you ignore these and only look at pipe size, your valve might not open or close properly. You could see leaks, noise, or even damage to your equipment.
Tip: Always check the flow and pressure in your system before picking a valve. Pipe size is just one piece of the puzzle.
Flow and Performance Impact
Choosing the wrong valve size affects how your whole system works. You can run into issues that make your equipment less reliable and more expensive to run.
Here’s what happens when pipe and valve sizes don’t match:
- Undersized pipes restrict flow and overload pumps.
- Oversized pipes flatten the system resistance curve, causing uncontrolled flow movement.
- Instability in flow at part load and excessive pump head requirements.
- Uneven distribution between branches and elevated return temperatures due to high bypass flow.
- Poor heat transfer and insufficient temperature lift.
- Higher energy use from pumps and heat sources due to hydraulic imbalances.
If you pick a check valve based only on pipe size, you might see the valve fail to open fully. This can lead to chattering, noise, and early wear. Your pump might work harder, using more energy and costing you more money. Sometimes, you get uneven flow in different parts of your system, which can cause temperature problems and poor performance.
| Problem | Result |
|---|---|
| Valve too big | Doesn’t open fully, wastes energy |
| Valve too small | Restricts flow, overloads pump |
| Pipe size mismatch | Causes hydraulic imbalance and instability |
You want your check valve to match your system’s real needs. Look at flow, pressure, and how your equipment runs. Don’t just rely on pipe size. This helps you avoid common mistakes and keeps your system running smoothly.
How to Size a Check Valve: Step-by-Step
Define System Conditions
Before you pick a check valve, you need to know what your system looks like. This means you should gather all the important facts about your setup. If you skip this step, you might choose the wrong valve and run into problems later.
Here’s what you need to write down:
- Flow rate (how much fluid moves through your system)
- Pressure drop (how much pressure you lose across the valve)
- Pipe size and connection type
- Valve type and design
- Material compatibility (does the valve material work with your fluid?)
- Cracking pressure (the pressure needed to open the valve)
- Installation orientation (is the valve upright, sideways, or upside down?)
- Standards and codes (are there rules you need to follow?)
When you know these details, you can start to figure out how to size a check valve for your system. You’ll avoid common mistakes and make sure your equipment works well.
Tip: Take your time with this step. The more you know about your system, the easier the next steps will be.
Determine Flow Range
Now, you need to find out how much fluid will move through your valve. This is called the flow range. You want to know the lowest and highest flow rates your system will see. If you only look at the average, you might miss times when the flow is much higher or lower.
Here’s how you can do this:
- Check your system’s design documents for flow rates.
- Measure the flow if you can.
- Write down the minimum and maximum flow rates.
A properly sized check valve should work well at both high and low flows. For most control valves, you want them to be about 60% to 80% open at maximum flow. At minimum flow, they should not be less than 20% open. This helps the valve control the fluid smoothly and last longer.
If you pick a valve that’s too big, it might not open enough at low flow. If it’s too small, it could block the flow at high demand. Knowing your flow range helps you avoid these problems.
Allowable Pressure Drop
Pressure drop is the difference in pressure before and after the valve. Every check valve creates some resistance, which causes a drop in pressure. You want to keep this drop as low as possible, but not zero. If the pressure drop is too high, your pump has to work harder. If it’s too low, the valve might not close properly.
Here’s what you should do:
- Decide how much pressure drop is okay for your system.
- Look at your pump’s limits and your system’s needs.
- Most systems allow a small pressure drop, just enough to make the valve work right.
You can use a table like this to help you keep track:
| Flow Rate (GPM or LPM) | Allowable Pressure Drop (psi or bar) |
|---|---|
| Minimum | |
| Normal | |
| Maximum |
Write your numbers in the table. This makes it easy to see if a valve will work for your system.
Note: If you’re not sure about the right pressure drop, ask your valve supplier or check your system’s manual.
When you follow these steps, you’ll have a strong start on how to size a check valve. You’ll know your system, your flow range, and how much pressure drop you can allow. This makes the next steps much easier.
Check Valve Flow Capacity (Cv/Kv)
Now you need to check the flow capacity of your check valve. This is where the Cv (flow coefficient) or Kv (metric version) comes in. Cv tells you how much water can flow through the valve with a certain pressure drop. If you pick a valve with the wrong Cv, your system might not work right.
Here’s how you can use Cv or Kv:
- Find your system’s flow rate and the pressure drop you want.
- Look at the valve’s Cv or Kv rating in the manufacturer’s data.
- Make sure the valve’s Cv is equal to or higher than what your system needs.
You can use this simple formula to check if the valve will work:
Cv = Q / √ΔP
Where:
- Q = Flow rate (in gallons per minute)
- ΔP = Pressure drop (in psi)
If you use metric units, use Kv and liters per minute. Most valve catalogs show these numbers, so you don’t have to do the math every time.
Tip: Always pick a valve with a Cv that matches your highest flow rate, but don’t go too high. If the Cv is much bigger than you need, the valve might not open fully at low flows.
A good match means your valve opens and closes smoothly. You avoid chattering, noise, and early wear. This step is key when you want to learn how to size a check valve the right way.
Cracking Pressure Selection
Cracking pressure is the minimum pressure needed to open the check valve. If you get this wrong, your valve might not open when you need it, or it might let fluid leak backward.
Here’s what you should do:
- Check your system’s lowest pressure at the valve location.
- Pick a valve with a cracking pressure just below this number.
- Don’t pick a valve with a cracking pressure that’s too high, or your flow might never start.
- Don’t pick one that’s too low, or you could get leaks or reverse flow.
Most manufacturers list the cracking pressure in their specs. Sometimes you can choose different spring options to set the cracking pressure just right for your system.
Note: If your system has changing pressures, pick a valve that works at both the lowest and highest points. This helps you avoid chattering and keeps your system safe.
Pressure and Temperature Ratings
You need to make sure your check valve can handle the pressure and temperature in your system. If you skip this step, you might end up with leaks, broken parts, or even a dangerous failure.
Here’s how to check:
- Look at your system’s maximum pressure. Pick a valve rated above this number.
- Check the highest and lowest temperatures your fluid will reach.
- Make sure the valve’s body and seals can handle these temperatures.
Some materials work better at high temperatures, while others are best for cold or freezing conditions. Always check the manufacturer’s ratings for both pressure and temperature.
| Factor | What to Check |
|---|---|
| Pressure | Valve rating > system max pressure |
| Temperature | Valve rating covers system range |
| Material | Compatible with fluid and temp |
Alert: Never use a valve outside its rated limits. This can cause leaks, damage, or even safety hazards.
When you follow these steps, you make sure your check valve will last and keep your system safe. Always double-check the ratings before you buy or install a valve.
Material and Seal Compatibility
You want your check valve to last a long time. The material and seals inside the valve play a big part in this. If you pick the wrong material, your valve can rust, crack, or even leak. Always match the valve material to the fluid in your system.
Here are some things to check:
- Fluid Type: Water, oil, chemicals, and gases all need different materials. For example, stainless steel works well with many chemicals, but brass might not.
- Corrosion Resistance: If your fluid is salty or acidic, choose a valve that resists corrosion.
- Seal Material: The seals inside the valve keep it from leaking. Rubber seals work for water, but you might need Teflon or Viton for hot or harsh chemicals.
- Temperature Limits: Some materials get soft or brittle at high or low temperatures. Make sure your valve can handle the hottest and coldest days your system will see.
Tip: If you are not sure which material or seal to pick, ask your supplier. They can help you find the best match for your fluid and temperature.
A good match means fewer leaks, less maintenance, and a longer life for your check valve.
Connection and Space
You need to make sure your check valve fits your piping and the space around it. If you skip this step, you might have trouble during installation or repairs.
Think about these points:
- Connection Type: Check if your system uses threaded, flanged, or welded connections. Each type needs a different valve.
- Pipe Size: The valve should fit your pipe, but also match your flow needs.
- Space for Installation: Some valves are big and heavy. Make sure you have enough room to install and remove the valve. Leave space for tools and hands.
- Orientation: Some check valves only work in certain positions. Check if your valve needs to be upright or can work sideways.
| Connection Type | Best For | Notes |
|---|---|---|
| Threaded | Small pipes, easy jobs | Quick to install, less strong |
| Flanged | Large pipes, strong | Needs more space, sturdy |
| Welded | Permanent setups | Hard to remove, leak-proof |
Note: Always measure your space before you buy a valve. This saves you time and trouble later.
Confirm with Manufacturer Data
You have gathered all your system details and picked a check valve that seems right. Before you buy, always check the manufacturer’s data and talk to their technical support. This step helps you avoid mistakes and keeps your system safe.
Here’s why you should confirm with the manufacturer:
- They can help you check if your valve size and type fit your system.
- They may suggest a surge investigation to see if you need a special check valve or a pump control valve.
- They know which valves last longer and work better for your fluid and pressure.
- They help you avoid unplanned shutdowns and protect your equipment.
Alert: Never skip this step. Manufacturer data gives you the final answer on how to size a check valve for your system.
If you follow these steps, you will feel confident that your check valve will work well and last a long time.
Technical Factors in Sizing
Flow Rate and Pressure Drop
When you size a check valve, you need to think about how much fluid moves through your system. This is your flow rate. If you push more fluid through the valve, the pressure drop across the valve gets bigger. That means your pump has to work harder.
Here’s what happens as flow rate changes:
- When you increase the flow rate, the pressure drop across the valve goes up.
- Higher flow rates make the fluid move faster. This causes more energy loss because of friction and turbulence inside the valve.
- Every check valve has a flow range. If you go over that range, the pressure drop can rise a lot.
If you pick a valve that is too small for your flow, you will see a big pressure drop. Your pump might struggle. If you pick a valve that is too big, it might not open all the way at low flows. That can cause chattering and wear.
Tip: Always check your system’s highest flow rate. Make sure your valve can handle it without causing a large pressure drop.
You can use a table like this to keep track:
| Flow Rate (GPM) | Pressure Drop (psi) |
|---|---|
| Low | |
| Normal | |
| High |
Write down your numbers. This helps you see if your valve is the right size.
Cracking Pressure Effects
Cracking pressure is the smallest pressure that will open your check valve. You need to get this number right for your system to work well.
Here’s why cracking pressure matters:
- Cracking pressure controls when the valve opens and closes. If it’s too high, your system might not push enough to open the valve.
- A high cracking pressure can cause water hammer. This is a loud banging noise that can break pipes and damage valves.
- Different valves need different cracking pressures. Some solenoid valves need more, while others need less. You should match the valve to your system.
- Cracking pressure also changes how the fluid flows. If you don’t manage it, you might get problems like cavitation. That’s when bubbles form and can damage the valve.
If you pick the wrong cracking pressure, your valve might not open when you need it. Or, it might slam shut and hurt your system.
Note: Always check the manufacturer’s specs for cracking pressure. Pick a valve that matches your system’s lowest pressure at the valve spot.
When you understand flow rate, pressure drop, and cracking pressure, you can size your check valve with confidence. Your system will run smoother, last longer, and stay safe.
Hydraulic System Considerations
Oil Viscosity and Contamination
You might think all fluids act the same, but oil can surprise you. The thickness of oil, called viscosity, changes how your check valve works. If you use thick oil, your valve might need more force to open. Thin oil flows easily, but thick oil pushes back.
- More viscous fluids need a higher crack pressure to get moving.
- If you use thick oil, you may need to adjust the crack pressure setting.
- Viscosity changes how much force your system needs to move oil through pipes and valves.
Contamination is another big deal. Dirt or tiny metal bits in your oil can cause trouble. Some check valves, like poppet and pilot-operated types, need very clean oil. If you use dirty oil, these valves might leak or stop working.
- Poppet and pilot-operated check valves need cleaner oil than ball check valves.
- Contamination can cause reverse leakage, so you need good filters.
- Ball check valves can handle a bit more dirt, but clean oil always works best.
Tip: Always check your oil’s viscosity and keep your system clean. This helps your check valve last longer and work better.
High Pressure and Transients
Hydraulic systems often run at high pressure. This can make check valve sizing tricky. When pressure changes fast, you get something called a transient. These quick changes can slam your valve shut and send shock waves through your pipes.
High pressure and transient conditions can cause check valve slam. This happens when the pump stops and oil tries to flow backward. If the valve closes too late, the oil hits the closed valve and makes a loud bang. This is called water hammer. It can break pipes and damage your system.
The best way to stop valve slam is to pick a check valve with the right opening and closing time. Some valves close in a split second. Others use special devices or actuators to close slowly and gently. You need to match the valve’s speed to your system.
If you size your check valve right, you can avoid these shocks and keep your system safe.
Flow Direction and Actuators
Hydraulic systems often use actuators, like cylinders or motors, to move things. You need to make sure your check valve matches the flow direction. If you get it wrong, your actuator might not move, or it could move the wrong way.
- Always check which way the oil flows in your system.
- Some actuators need oil to flow in both directions. You might need a special valve for that.
- If your system changes direction, use a valve that can handle reverse flow.
Note: Take time to map out your flow paths. This helps you pick the right check valve and keeps your actuators working smoothly.
When you think about oil viscosity, pressure changes, and flow direction, you set your hydraulic system up for success. Your check valve will last longer, and your equipment will run better.
Common Check Valve Types
Swing Check
Swing check valves are probably the most common type you’ll see. You can spot them by their simple design. Inside, there’s a disc that swings on a hinge. When fluid flows in the right direction, the disc swings open. If the flow tries to reverse, the disc swings shut and blocks it.
You’ll find swing check valves in water, wastewater, and low-pressure systems. They work well with clean fluids. If you have a system with a lot of debris or thick fluids, these valves might not close tightly. The disc can get stuck or blocked.
Key features of swing check valves:
- Simple and reliable for most water and low-pressure uses
- Low pressure drop when fully open
- Not great for pulsating or very fast-changing flows
Tip: If your system has slow or steady flow, a swing check valve is a solid choice. For systems with lots of starts and stops, you might want to look at other types.
Piston (Lift) Check
Piston check valves, also called lift check valves, use a disc or piston that moves up and down inside a guide. When fluid pushes in the right direction, the piston lifts up. If the flow reverses, gravity or a spring pushes the piston back down to seal the valve.
You’ll often see piston check valves in high-pressure or high-temperature systems. They handle steam, hot water, and even some chemicals. The design gives you a tight seal, so you get less leakage.
Why choose a piston check valve?
- Good for high-pressure and high-temperature jobs
- Works well with clean, non-sticky fluids
- Can handle fast flow changes better than swing checks
| Feature | Swing Check | Piston (Lift) Check |
|---|---|---|
| Best for | Water, low pressure | Steam, high pressure |
| Seal tightness | Moderate | High |
| Flow direction | Horizontal best | Any direction |
Note: Piston check valves need clean fluids. Dirt or debris can jam the piston and stop the valve from working.
Ball Check
Ball check valves use a round ball as the closing part. When fluid flows forward, the ball lifts off its seat and lets fluid pass. If the flow reverses, the ball rolls back and seals the opening.
You’ll see ball check valves in sump pumps, sewage, and thick or dirty fluids. The ball can move freely, so it doesn’t get stuck as easily as other types. These valves work in any position—vertical, horizontal, or even upside down.
Advantages of ball check valves:
- Great for dirty or thick fluids
- Simple design with few moving parts
- Can handle fluids with small solids or debris
If you need a check valve for a pump or a system with a lot of grit, a ball check valve is a smart pick. Just remember, they might not seal as tightly as piston types in high-pressure jobs.
Cartridge and Inline
Cartridge and inline check valves give you a lot of flexibility in your system. You might see these called “spring check valves” or “inline check valves.” They look different from swing or ball types. Instead of a big body, cartridge valves fit inside a special cavity or manifold. Inline valves go right into your piping, usually in a straight line.
You use cartridge check valves when you want a compact setup. These valves save space. They fit inside blocks or manifolds, so you don’t need extra pipe fittings. This makes your system smaller and lighter. If you work with machines that need to be portable or have limited room, cartridge valves are a smart choice.
Inline check valves are easy to install. You just connect them between two pieces of pipe. They work well in both horizontal and vertical lines. You don’t have to worry much about which way the valve sits. The spring inside pushes the disc or poppet closed when the flow stops or tries to reverse.
Here’s why you might pick a cartridge or inline check valve:
- You want a valve that works in any position—sideways, upright, or even upside down.
- Your system cycles on and off a lot. These valves handle high-cycle duty without wearing out fast.
- You need something that fits in a tight spot or inside a manifold.
- You deal with pulsating flows, like in hydraulic or pneumatic systems.
Tip: Cartridge and inline check valves are great for compact, high-cycle systems. They handle quick starts and stops better than swing check valves.
Let’s compare how different check valves fit different jobs:
| Valve Type | Application Suitability |
|---|---|
| Swing Check Valve | Low-pressure, high-flow jobs like tank return lines and cooler bypasses. Not for high-cycle or load holding. |
| Spring Check Valve (Cartridge/Inline) | High-cycle, multi-orientation systems. Good for pulsating flows and tight spaces. |
| Ball Check Valve | Large pipes, low-pressure water, or clean fluid systems. |
You can see that cartridge and inline (spring) check valves stand out when you need something tough and compact. They work well in machines that start and stop often. You can use them in many positions, so you don’t have to worry about how you install them.
If you want a check valve that’s easy to fit, lasts a long time, and handles lots of cycles, cartridge and inline types are a solid pick. They keep your system safe and efficient, even when space is tight or the flow changes quickly.
Conclusion
Getting the check valve size right helps keep your hydraulic system safe, efficient, and reliable. Do not choose a valve based only on pipe size. Flow rate, working pressure, allowable pressure drop, fluid type, viscosity, cracking pressure, and connection requirements should all be considered before making a final decision.
Chenyang Hydraulic is a professional hydraulic check valve manufacturer in China. We manufacture standard and custom check valves for different flow rates, pressure levels, materials, cracking pressures, and connection types. If you are unsure which size is suitable for your system, contact our team with your operating conditions, drawings, or samples. We can help you select and manufacture the right hydraulic check valve for your application.
FAQ
How do I know if my check valve is the right size?
You can check for smooth operation. If you hear chattering or see leaks, the size might be wrong. Always compare your system’s flow and pressure to the valve’s specs.
Can I use the same check valve for water and oil?
No, you shouldn’t. Water and oil have different thickness and chemical properties. You need to pick a valve material and seal that matches your fluid.
What happens if I oversize a check valve?
Oversized check valves may not close fully. You might hear rattling or see leaks. This can wear out the valve faster and cause system problems.
How often should I check or replace my check valve?
Check your valve every year. If you see leaks, noise, or slow movement, replace it. Some systems need more frequent checks if they run all the time.
What is cracking pressure?
Cracking pressure is the minimum pressure needed to open the valve. If your system pressure is lower than this, the valve stays closed.
Do check valves work in any position?
Not always. Some check valves work in any position, but others need to be upright or horizontal. Always read the manufacturer’s instructions.
Can I install a check valve myself?
You can, if you have basic plumbing skills. Make sure you follow the instructions and use the right tools. If you’re unsure, ask a professional.