
You want to learn how to adjust a hydraulic flow control valve. First, think about safety. Hydraulic systems use high pressure. Wear the right PPE and follow all rules. Changing the valve setting changes actuator speed by changing flow. Turn the adjustment screw slowly. Check your valve design for the correct way to turn it.
There are three main ways people get hurt with hydraulic valves. High-pressure fluid can inject into your skin. Hot fluid can burn you. Hoses or fittings can hit you if they come loose. Always pay attention and keep yourself safe.
Key Takeaways
- Safety comes first. Always wear PPE. Follow lockout/tagout steps before you start work on hydraulic systems.
- Learn about your hydraulic flow control valve. Know what type it is and what it does. This helps you adjust it the right way.
- Change the valve in small steps. Small changes help you stay in control. This also stops the system from becoming unstable.
- Check for leaks often. Watch how the system works after you make changes. Finding problems early can stop bigger issues later.
- Use the correct tools for the job. You will need wrenches, pressure gauges, and flow meters. These tools help you make good adjustments.
- Read the manufacturer’s manual for your valve. The manual gives special instructions and warnings. This helps you handle and care for the valve the right way.
- Pick the right valve type and size for your system. If you use the wrong valve, it can cause problems and damage.
- Write down every change and maintenance task you do. Keeping records helps you see how the system works over time.
Hydraulic Flow Control Valve Basics
What Is a Flow Control Valve
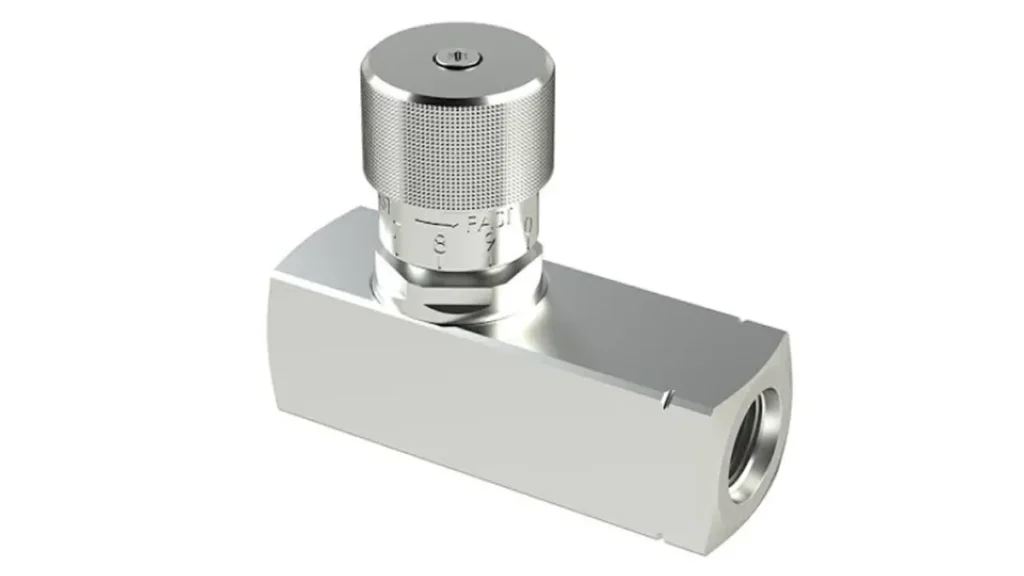
A flow control valve helps you control how much fluid moves in a hydraulic system. This valve lets you set how fast cylinders or motors move. When you turn the adjustment screw, you make the opening inside bigger or smaller. If the opening is small, less fluid goes through and things move slower. If the opening is big, more fluid goes through and things move faster. This helps you decide how fast your machine works.
There are different types of flow control valves for different jobs. Some valves let you make small changes to the flow. Other valves are good for stopping flow quickly or letting a lot of fluid move. Almost every hydraulic system uses a flow control valve.
Types of Hydraulic Flow Control Valves
You can find many kinds of flow control valves in factories and on machines. Each type does something special. Here are some common valves:
| Valve Type | Function/Use Description |
|---|---|
| Ball valve | Basic flow control and isolation |
| Needle pin flow control valve | Fine, precise adjustment of flow, often in metering applications |
| Diaphragm valve | Handling corrosive or abrasive fluids, suitable for chemical processing |
| Butterfly valve | High flow, low-pressure drop applications, common in large pipelines and mobile hydraulics |
One-Way Valves
A one-way valve is also called a check valve. It lets fluid move in only one direction. You use this valve to stop fluid from going backward. This keeps your system safe and working right. You cannot adjust the flow with a one-way valve, but it protects your equipment.
Two-Way Valves
A two-way valve lets fluid move both ways. You can open or close the valve to start or stop the flow. Some two-way valves let you change how much fluid moves, so you can make your system work just right. These valves are used in machines that need smooth and steady movement.
Common Applications
Hydraulic flow control valves are used in many machines. These valves help control speed, force, and movement. Here are some places where you might see them:
| Application Area | Description |
|---|---|
| Construction Equipment | Flow control valves help heavy machines like excavators, cranes, and loaders move smoothly and lift safely. |
| Agriculture Equipment | In farming, these valves help sprayers, tillers, and harvesters work evenly and do their jobs well. |
You also find these valves in factories, chemical plants, and on mobile machines. Picking the right flow control valve makes your system safer and helps it work better.
Why Adjust Hydraulic Flow Control Valve
System Performance Impact
When you adjust a hydraulic flow control valve, you change how your hydraulic system works. You control how much power goes to the machine parts. This helps you get the right speed and force for each job. If you set the valve just right, your system runs better and uses less energy.
Here are some ways a good adjustment can help your system:
- You get faster response times from your machine.
- The system works more smoothly and does not jerk or stall.
- You use less energy, which saves money and keeps things cooler.
- Your machine has less downtime because everything runs as it should.
If you use a high-quality valve and set it up well, your hydraulic system will be more efficient and reliable.
Actuator Speed and Precision
The flow control valve decides how fast your actuators move. If you want a cylinder to move slower or faster, you turn the valve to change the flow rate. This is important when you need your machine to do careful work or move at just the right speed.
- The valve controls the flow rate, which sets the actuator speed.
- The speed depends on how much fluid moves at a certain pressure.
- Some valves have special features that keep the flow steady, even if the pressure changes. This helps you get better accuracy.
After you adjust the valve, you should run the system and watch how the actuator moves. Listen for new sounds or changes. This helps you spot problems early and make sure everything works as planned.
Risks of Incorrect Adjustment
If you do not adjust the valve the right way, you can run into trouble. Here is a quick look at what can go wrong:
| Symptom/Failure | Possible Causes |
|---|---|
| Actuator overspeeding | Valve opened too much, causing parts to move too fast and maybe get damaged. |
| System overheating | Valve set too tight, so fluid keeps hitting the relief valve and heats up. |
| Difficulty in adjustment | Threads on the valve are damaged or parts are missing. |
| Erratic flow/speed changes | The valve is the wrong size or has a broken part inside. |
Tip: Always check your valve settings and watch for leaks or strange noises. Small mistakes can lead to big problems in your hydraulic system.
Safety Checks Before Adjusting Flow Control Valve
High Pressure Hazards
You should always remember that a hydraulic system works under very high pressure. Even a small leak can shoot out fluid with enough force to cut your skin or cause serious injury. If you touch a leak, the fluid can inject under your skin. This is a medical emergency. Hot hydraulic fluid can also burn you. Sometimes, hoses or fittings can burst or come loose. These parts can whip around and hit you hard. Never assume a hydraulic system is safe just because it looks quiet. Pressure can stay trapped inside even after you turn off the machine.
Tip: Always treat every hydraulic system as if it is pressurized until you have checked and released all pressure.
Required PPE
Before you start any work, you need to wear the right personal protective equipment. This gear keeps you safe from burns, cuts, and flying parts. OSHA’s Control of Hazardous Energy (Lockout/Tagout) standard says you must use special steps and gear to protect yourself when working on machines with stored energy, like hydraulic systems.
Here’s what you should wear:
- Gloves to protect your hands from hot fluid and sharp edges
- Safety glasses to shield your eyes from splashes or flying debris
- Face shield for extra face protection when you expect fluid spray
- Steel-toed shoes to guard your feet from heavy parts or dropped tools
- Protective clothing, like long pants and long sleeves, to cover your skin
Never skip PPE, even if you think the job will be quick. One accident can change everything.
Depressurization Steps
You need to release all pressure before you adjust a flow control valve. If you skip this step, you risk serious injury. Here’s a simple way to make sure your hydraulic system is safe:
- Turn off the machine and make sure nobody can start it by mistake.
- Move all controls to the “off” or “neutral” position.
- Slowly move the hydraulic controls to release any trapped pressure in the lines.
- Open any bleed valves or follow your machine’s manual to let out leftover pressure.
- Double-check the pressure gauges to make sure the system reads zero.
- Wait a few minutes before you start working, just in case pressure builds up again.
Note: Always follow the steps in your equipment manual. Some hydraulic systems have special ways to release pressure.
If you follow these safety checks, you lower your risk and keep yourself and others safe while working on any hydraulic system.
Lockout/Tagout Procedures
You must use lockout/tagout every time you work on hydraulic equipment. These steps help keep you safe from sudden movement or energy release. If you skip lockout/tagout, you could get hurt or break something. Here is what you need to do:
- You should keep the key for your own lockout device. Only you should be able to open your lock.
- Each person working must put their own lock and tag on every isolation point. This makes sure no one can start the machine until all workers are done.
- Find any stored energy in the system. You need to disconnect, release, or block these dangers before you begin.
- Make sure the equipment has no power left. Check that all energy sources are off. Look at the pressure gauges and make sure they show zero.
- Keep the lockout/tagout steps in place while you work. Talk with your team so everyone knows what is going on.
- When you finish, follow the right steps to turn the equipment back on. Take away tools, clean up, and tell everyone before you remove locks and tags.
Tip: Do not hurry through lockout/tagout. Take your time and check every step. If you are unsure, ask your boss or look at your company’s safety guide.
Lockout/tagout keeps you and your team safe. It helps stop accidents before they happen. You should always use these steps as part of your normal work.
Manufacturer Warnings
Manufacturers put warnings and instructions on purpose. You need to read the manual before you adjust any hydraulic valve. Each valve might have special needs. Some valves need special tools. Others have rules about how much you can turn the adjustment screw.
Look for warning labels on the valve. These labels may tell you about the highest pressure, flow direction, or how far you can adjust. If you ignore these warnings, you might break the valve or cause a leak.
Note: Always do what the manufacturer says. If you do not have the manual, check the company’s website or ask their support team. Never guess when working with hydraulic safety.
Sometimes, manufacturers change their instructions. You should look for the newest information before you start. If you see a warning you do not understand, ask someone who knows more. Learning and following the rules keeps you safe and helps your equipment last longer.
Tools and Info for Adjusting Flow Control Valve
Before you start adjusting a hydraulic flow control valve, you need to gather the right tools and information. Having everything ready makes the job safer and easier. Let’s look at the tools you’ll need and why reading the system documents matters.
Essential Tools
You can’t adjust a hydraulic valve with just your hands. You need the right gear for the job. Here’s a quick look at what you should have on hand:
| Tool | Purpose |
|---|---|
| Flow meter | Measures actual fluid flow rate |
| Pressure gauge | Monitors system pressure |
| Adjustable wrench | Makes valve adjustments |
| Locknuts or clips | Secures your settings |
| Safety equipment | Protects you during work |
Wrenches and Screwdrivers
You’ll use an adjustable wrench to loosen or tighten the locking nut on the valve. Sometimes, you need a flathead or Phillips screwdriver to turn the adjustment screw. Make sure your tools fit well. If your wrench or screwdriver slips, you could damage the valve or hurt yourself.
Pressure Gauges and Flow Meters
A pressure gauge helps you see if the system is safe to work on. You want to check that the pressure is at zero before you start. After you adjust the valve, you can use the gauge to see if the pressure stays in the safe range. A flow meter shows you how much fluid is moving through the valve. This helps you set the flow just right for your machine.
Markers for Settings
It’s smart to use a marker or paint pen to mark the starting position of the adjustment screw. This way, you can always go back to your original setting if you need to. You can also mark the new setting after you finish. This helps you and your team remember what you changed.
Tip: Always double-check your tools before you start. Clean tools work better and keep you safe.
System and Valve Documentation
Don’t skip the paperwork! The system and valve documents are just as important as your tools. Here’s why you should read them:
- The documents give you the manufacturer’s guidelines and recommendations.
- You’ll find the best way to adjust your specific valve.
- Following the manual helps your valve last longer and work better.
- You avoid mistakes that could damage your system or cause leaks.
- The paperwork tells you about special steps or warnings for your valve.
If you follow the instructions in the manual, you’ll keep your hydraulic system running smoothly. You’ll also stay safe and avoid costly repairs.
Note: If you can’t find the manual, check the manufacturer’s website or ask your supervisor for help.
How to Adjust a Hydraulic Flow Control Valve
Preparation and System Warm-Up
Before you start, you need to get your hydraulic system ready. This step is important if you want to know how to adjust a hydraulic flow control valve safely and correctly. You should always check the fluid in your system. If it is winter, switch to a winter-grade hydraulic fluid like ISO VG 32 or lower. Test the fluid’s thickness and make sure it matches what your machine needs. If you used summer fluid, drain it out and fill with the right type. Check that the fluid works with your seals.
Next, look at all the parts that matter most. Inspect seals and replace any that look worn out. Protect lines by adding insulation if it is cold. If your system has a heater, turn it on. Clean the oil cooler fins and test the cooling fan. If you see dirt or dust, wipe it away. Sometimes, you need to install extra coolers or use high-temperature fluids. Add anti-oxidation additives if your manual says so. Watch for signs that the fluid is getting old or dirty.
When seasons change, flush out old fluid and check for water or dirt. Clean breathers and vents. Recalibrate the pressure settings if needed. Always let your system warm up to its normal working temperature before you adjust anything. This helps you get the right flow and keeps your machine safe.
Tip: Never skip the warm-up. Cold fluid can give you the wrong readings and make your adjustments useless.
Loosen Locking Nut
Now you are ready for the next step in this step-by-step guide. Find the locking nut on your hydraulic flow control valve. This nut keeps the adjustment screw from moving by accident. Use the right wrench to loosen the nut. Hold the valve steady so you do not twist or bend anything.
Do not take the nut off all the way. Just loosen it enough so you can turn the adjustment screw. If the nut is stuck, spray a little oil on it and wait a few minutes. Never force it. If you break the nut, you might need a new valve.
Note: Keep your tools clean and dry. Dirty tools can slip and hurt your hands.
Turn Adjustment Screw
You have reached the heart of how to adjust a hydraulic flow control valve. Look for the adjustment screw or knob on the valve body. Most valves use a screw, but some have a knob. Check your manual if you are not sure.
Here is what you do:
- Turn the screw clockwise to decrease the flow. This makes the actuator move slower.
- Turn the screw counterclockwise to increase the flow. This makes the actuator move faster.
- Make small turns. Go slow and check the flow after each turn.
- If you want to go back to your old setting, use the mark you made earlier.
Always turn the screw gently. If you force it, you can damage the threads or break the valve. After each turn, watch the flow meter and pressure gauge. This helps you see if you are getting closer to the speed you want.
Tip: If you do not see a change, stop and check for problems. The valve might be stuck or the system might have a blockage.
You now know how to adjust a hydraulic flow control valve using safe and smart steps. Keep going with the next steps in this guide to finish the job right.
Clockwise vs Counterclockwise
You might wonder which way to turn the adjustment screw. This part can feel confusing, but it gets easier once you know the basics. Most hydraulic flow control valves follow a simple rule. If you turn the screw clockwise, you make the opening smaller. This means less fluid can pass through, so your actuator moves slower. If you turn the screw counterclockwise, you open the valve more. More fluid flows, and your actuator speeds up.
Always check your valve’s manual or look for arrows on the valve body. Some valves have special designs. The direction could be different. If you are not sure, start with a small turn and watch what happens. Never force the screw. If it feels stuck, stop and check for problems.
Tip: Mark the starting position before you turn anything. This way, you can always go back if you need to.
Make Incremental Adjustments
Don’t rush when you adjust a hydraulic flow control valve. Small changes work best. If you turn the screw too much at once, you could make the system unstable or even damage parts. Take your time and make tiny adjustments.
Here’s why you should adjust in small steps:
- You get precise control over how much fluid moves.
- The system stays stable and does not jerk or surge.
- You can fine-tune the speed, so your machine runs smoother.
- The valve responds better to what your system needs.
After each small turn, stop and check how the actuator moves. Listen for new sounds. Watch for changes in speed. If you see something strange, go back to your last setting. This method helps you avoid mistakes and keeps your system safe.
Test and Monitor Flow
Now it’s time to see if your adjustment works. You need to test and watch the system closely. Follow these steps to make sure everything is running right:
- Turn the hydraulic system back on after you finish your adjustment.
- Watch the actuator or machine part. Make sure the flow matches what you want.
- Look for leaks around the valve and hoses. Even a small drip can cause problems.
- If the speed is not perfect, make another small adjustment while the system is running.
- Tighten the locking nut or any fixtures to keep your setting in place.
- Write down what you changed. This helps you or your team next time.
Note: Always stay alert when the system is running. If you hear strange noises or see leaks, stop and check right away.
Testing and monitoring help you catch problems early. You keep your machine safe and working its best.
Check for Leaks
You just made your adjustment, but you are not done yet. Now, you need to check for leaks. Leaks can cause big problems in a hydraulic system. Even a small drip can lead to lost pressure, wasted oil, or even a dangerous mess. You want to catch leaks early before they turn into bigger issues.
Start with a good look at the valve and all the connections. Use your eyes and your hands. Feel around the seals and fittings. If you see oil, wet spots, or dirt sticking to oily places, you might have a leak. Sometimes, you will spot a shiny spot or a small puddle under the valve.
Here are some smart ways to check for leaks after you adjust a hydraulic flow control valve:
- Visual Inspection: Look closely at seals, fittings, and the valve body. Check for oil, cracks, or corrosion. If you see any damage, fix it right away.
- Hydraulic Pressure Testing: Use a pressure gauge to see if the system holds steady. If the pressure drops when it should stay the same, you might have an internal leak.
- Monitoring Fluid Condition: Check the oil in your reservoir. If it looks dark, smells burnt, or has metal flakes, your valve could be wearing out or leaking inside.
- Leak Testing Techniques: Try bubble testing. Wipe the area clean, then brush soapy water on the joints. If you see bubbles when the system runs, you found a leak. You can also use pressure decay testing if you have the right tools.
Tip: Never use your bare hands to check for leaks on a pressurized system. High-pressure oil can hurt you. Always wear gloves and safety glasses.
If you find a leak, fix it before you move on. Tighten fittings, replace seals, or swap out damaged parts. A leak-free system works better and keeps you safe.
Lock Setting and Record
Once you finish your adjustments and check for leaks, you need to lock in your settings. This step keeps your hard work from slipping away. Most hydraulic flow control valves have a locking nut or a set screw. Tighten this nut gently with your wrench. Do not overtighten. If you crank it down too hard, you could strip the threads or damage the valve.
After you lock the setting, grab your marker or paint pen. Mark the new position of the adjustment screw. This mark helps you or your coworkers see where the valve is set. It also makes future adjustments easier.
Now, write down what you did. Use a maintenance log or a notebook. Record the date, the valve’s location, the new setting, and any notes about the system’s performance. If you used a flow meter or pressure gauge, write down those numbers too.
Here’s a simple checklist for this step:
- Tighten the locking nut or set screw to secure your adjustment.
- Mark the new setting with a marker or paint pen.
- Record the adjustment in your maintenance log, including date, valve location, and flow/pressure readings.
- Note any problems you found or repairs you made.
Note: Good records help you track changes and spot patterns. If something goes wrong later, you can look back and see what changed.
By locking your setting and keeping good records, you make sure your hydraulic system stays safe, steady, and easy to maintain.
Adjusting Flow Control Valves: Common Mistakes
Adjusting Too Quickly
You might feel tempted to turn the adjustment screw fast and get the job done. That’s a big mistake. When you rush, you can make the system unstable. The machine might jerk or move in ways you don’t expect. Small, slow turns work best. You want to see how each change affects the speed and pressure. If you move too fast, you could cause uneven pressure or even damage the valve.
Here’s what can happen if you adjust too quickly:
- The actuator may overshoot or stop suddenly.
- You might hear strange noises or feel vibrations.
- The system can lose balance, making your work harder.
Take your time. Let the system respond before you make another change. Patience keeps your machine safe and smooth.
Ignoring Flow Direction
Every flow control valve has a correct direction for fluid to move. If you install or adjust the valve without checking the arrows or labels, you can cause big problems. Fluid moving the wrong way can block the valve or make it act strange. You might see erratic movement or even lose control of the actuator.
Some signs you ignored flow direction:
- The actuator moves slower than it should.
- The valve makes odd or loud noises.
- You notice uneven pressure or leaks.
Always look for the flow direction arrow on the valve body. If you can’t find it, check the manual. This small step can save you a lot of trouble.
Wrong Valve Type
Not all valves do the same job. If you pick the wrong one, your system won’t work right. For example, using a ball valve instead of a flow control valve can lead to poor control. Ball valves are for on/off use, not for fine adjustments. You need to match the valve type to your system’s needs.
Here’s a quick table to help you remember:
| Valve Type | Best Use | Not Good For |
|---|---|---|
| Flow Control | Adjusting speed/flow | On/off only |
| Ball Valve | Quick shut-off | Adjusting flow |
| Needle Valve | Fine flow adjustments | High flow rates |
If you use the wrong valve, you might see uneven pressure or even damage other parts. Sometimes, you’ll notice the machine acts strange or doesn’t respond well. Picking the right valve keeps your system balanced and efficient.
Tip: When adjusting flow control valves, always double-check the type and direction before you start.
Using Ball Valves for Control
You might think a ball valve can do the same job as a flow control valve. It looks simple and easy to use. You turn the handle, and the fluid moves or stops. But here’s the problem: ball valves are not made for fine adjustments. They work best for on/off control, not for setting flow rates.
When you try adjusting flow control valves with a ball valve, you lose precision. The ball inside opens or closes quickly. You cannot make small changes. If you try, you might see the actuator jump or move too fast. Machines can become hard to control. You could even damage parts if the flow changes too suddenly.
Let’s look at why you should avoid using ball valves for this job:
- Ball valves do not give you steady flow. The opening is either too big or too small.
- You cannot set the speed of your actuator with accuracy.
- The valve can wear out faster if you use it for throttling.
- You risk leaks or damage because the seals are not made for constant adjustment.
Tip: Always use a real flow control valve when you need to set or adjust flow. This keeps your system safe and easy to control.
Here’s a quick table to help you remember the difference:
| Valve Type | Best Use | Not Good For |
|---|---|---|
| Ball Valve | On/off control | Adjusting flow rate |
| Flow Control Valve | Setting flow speed | On/off only |
If you want smooth movement and safe machines, pick the right valve. Adjusting flow control valves with the wrong type can lead to trouble. You might see jerky motion, wasted energy, or even broken equipment.
When you work with hydraulic systems, always check the valve type before you start. If you see a ball valve, use it only for stopping or starting flow. For any job that needs careful speed control, reach for a flow control valve instead.
Note: Using the right valve saves you time and money. It also keeps your machine running longer.
Seal and Fluid Compatibility
Have you ever wondered why your hydraulic system starts leaking after you change the oil? The answer often comes down to seal and fluid compatibility. When you adjust or replace a flow control valve, you need to think about what’s inside your system. Not all seals work with every type of hydraulic fluid. If you mix the wrong ones, you can end up with leaks, swelling, or even total valve failure.
Let’s break it down. Most flow control valves use seals made from rubber, plastic, or special synthetic materials. Each seal type has a list of fluids it likes and some it hates. For example, nitrile (Buna-N) seals work well with standard mineral oils but don’t get along with phosphate ester fluids. Viton seals handle high temperatures and many chemicals, but they cost more.
Here’s a quick table to help you see which seal materials match common hydraulic fluids:
| Seal Material | Works Well With | Avoid With |
|---|---|---|
| Nitrile (Buna-N) | Mineral oil, water-glycol | Phosphate esters, some synthetic oils |
| Viton | Synthetic, high-temp fluids | Some brake fluids |
| EPDM | Water-based fluids | Mineral oil, petroleum |
| PTFE (Teflon) | Most fluids, chemicals | None (very broad use) |
If you use the wrong seal, your flow control valve might start leaking. Sometimes, the seal swells up and blocks the flow. Other times, it cracks and lets fluid escape. You might not notice right away, but over time, your system loses pressure and wastes oil.
Here’s what you should do before you adjust or install a flow control valve:
- Check the type of hydraulic fluid in your system.
- Read the valve’s manual to see which seals it uses.
- Make sure the seal material matches your fluid.
- If you plan to switch fluids, check if you need new seals.
Tip: Always ask your supplier or manufacturer if you’re not sure about compatibility. They can help you pick the right flow control valve and seals for your job.
Don’t forget about temperature, either. Some fluids get very hot and can break down seals faster. If your system runs hot, choose seals that can handle the heat. This keeps your flow control valve working longer and helps you avoid messy leaks.
When you pay attention to seal and fluid compatibility, you protect your equipment and keep your hydraulic system running smoothly. It’s a small step that saves you time, money, and headaches down the road.
Troubleshooting After Adjusting Hydraulic Flow Control Valve
Actuator Too Fast or Slow
You just adjusted your hydraulic flow control valve, but now the actuator moves too fast or too slow. This can feel frustrating. Don’t worry—there are steps you can take to fix it.
Start by checking the oil temperature. If the oil is too cold or too hot, it changes how thick the fluid is. Thick oil moves slower, while thin oil moves faster. This can make your actuator act strange. Next, look at the hydraulic fluid. Dirt or debris in the oil can block flow and cause the actuator to jerk or slow down.
You should also check the system pressure settings. If the pressure is too low, the actuator might move slowly or not at all. Sometimes, the relief valve is set too low, so the actuator does not get enough power. If you see these signs, adjust the pressure to match your machine’s needs.
Here’s a quick list to help you troubleshoot:
- Check oil temperature and make sure it matches the system’s normal range.
- Inspect the hydraulic fluid for dirt or contamination.
- Verify that the system pressure is set correctly.
- Look for low fluid levels or clogged filters.
- Test the flow with a flow meter to see if the pump is working right.
If you write down what you see and follow these steps, you can find the cause and fix it fast. This is one of the most common problems and solutions in hydraulic systems.
Unstable Movement
Sometimes, after adjusting the valve, you notice the actuator moves in a jerky or uneven way. This is called unstable movement. It can happen if you adjust the valve too quickly or if air gets trapped in the lines. Air bubbles make the actuator jump or shake.
To fix this, bleed the air from the system. Move the actuator through its full range a few times. This helps push out any trapped air. Also, check for worn seals or loose fittings. These can let air in or cause leaks. Make sure the valve is the right type for your system. If you use the wrong valve, you might see unstable movement.
If the problem stays, look at the fluid. Old or dirty oil can cause the actuator to act up. Change the oil if it looks dark or smells burnt.
Tip: Always make small adjustments and test the system after each change. This helps you spot problems early.
Valve Noise
You might hear strange noises from the valve after making adjustments. These sounds can include hissing, whining, or rattling. Noise often means there is a problem inside the valve or the system.
First, check if the valve is installed in the right direction. If fluid flows the wrong way, the valve can make noise. Next, look for air in the system. Air bubbles can cause a whistling or popping sound. Bleed the system to remove air.
Sometimes, the valve makes noise if it is worn out or damaged. Listen for changes in sound when you adjust the screw. If the noise gets louder, stop and inspect the valve. You may need to clean or replace it.
Note: Valve noise is a warning sign. Don’t ignore it. Fix the cause before it leads to bigger problems.
Pressure Spikes
Pressure spikes can surprise you after you adjust a hydraulic flow control valve. These spikes happen when the fluid suddenly faces a blockage or a quick change in flow. You might hear a loud bang or feel the machine shake. Sometimes, you see the pressure gauge jump up fast. This can damage hoses, seals, or even the valve itself.
Why do pressure spikes happen? Here are some common reasons:
- You close the valve too quickly.
- The actuator stops suddenly.
- There is air trapped in the system.
- The relief valve is set too high or is not working.
You can spot pressure spikes by watching the pressure gauge while the system runs. If the needle jumps or moves fast, you have a spike. You might also notice hoses bulging or fittings leaking.
How can you fix pressure spikes? Try these steps:
- Open or close the valve slowly. Quick moves cause sudden changes in flow.
- Bleed air from the system. Air bubbles make pressure jump around.
- Check the relief valve. Make sure it opens at the right pressure.
- Inspect hoses and fittings for damage. Replace any weak parts.
Tip: Always use a pressure gauge when you adjust the valve. This helps you catch spikes before they cause trouble.
Heat Generation
You may notice the hydraulic system gets hot after you adjust the flow control valve. Heat is a sign that something is not right. Too much heat can break down the oil, damage seals, and shorten the life of your equipment.
What causes heat in a hydraulic system? Here are some reasons:
- The valve is set too tight, so fluid keeps hitting the relief valve.
- The flow is too low, so the pump works harder.
- There is a blockage or restriction in the lines.
- The oil cooler is dirty or not working.
You can check for heat by touching the valve or hoses (carefully, with gloves). If they feel very hot, you have a problem. You can also use a temperature gun to measure the oil temperature.
To fix heat problems:
- Adjust the valve to allow more flow if possible.
- Clean or repair the oil cooler.
- Remove any blockages in the lines.
- Use the right oil for your system and climate.
Note: If you see smoke or smell burnt oil, stop the machine right away. Let it cool down before you check for problems.
Leakage
Leaks are a common problem after you adjust a hydraulic flow control valve. Even a small leak can cause big issues over time. You might see oil dripping from the valve, hoses, or fittings. Sometimes, you only notice a wet spot or a puddle under the machine.
Why do leaks happen? Here are some causes:
- You did not tighten the fittings enough.
- The seals are old or damaged.
- The valve body has a crack.
- The adjustment screw is worn out.
You can find leaks by looking for shiny spots, oil stains, or dirt stuck to oily areas. Use a clean rag to wipe the area and see if oil comes back. You can also use soapy water to check for bubbles around fittings.
To fix leaks:
- Tighten loose fittings, but do not overtighten.
- Replace worn or damaged seals.
- Swap out cracked or broken parts.
- Use the right sealant if the manual says so.
Alert: Never use your bare hands to check for leaks on a pressurized system. High-pressure oil can hurt you. Always wear gloves and safety glasses.
Leaks waste oil, make a mess, and can cause the system to lose pressure. Fix them as soon as you find them to keep your hydraulic system safe and strong.
No Response
You just finished adjusting your hydraulic flow control valve, but now nothing happens. The actuator does not move. The system feels dead. This can be frustrating, but you can solve it with a few simple checks.
First, ask yourself: Did you turn the valve too far closed? If you did, you might have blocked all the flow. The actuator cannot move without fluid. Try opening the valve a little at a time. Watch for any sign of movement.
Next, check the power. Is the hydraulic pump running? Sometimes, the main switch gets bumped off. Look at the control panel. Listen for the sound of the pump. If you hear nothing, turn the system off and check the power supply.
Now, look at the fluid level. Low oil means the pump cannot send fluid to the actuator. Find the reservoir and check the sight glass or dipstick. If the oil is low, top it up with the right hydraulic fluid.
You should also check for blocked lines. Dirt or debris can clog hoses and fittings. This stops fluid from reaching the actuator. Run your hand along the hoses (with gloves on) and feel for kinks or tight bends. If you find a blockage, clean or replace the line.
Here’s a quick checklist to help you troubleshoot a “no response” problem:
- Open the flow control valve slightly and test for movement.
- Check the main power switch and pump operation.
- Inspect the hydraulic fluid level in the reservoir.
- Look for clogged or kinked hoses.
- Examine the actuator for signs of damage or stuck parts.
- Make sure the relief valve is not stuck open.
Tip: If you hear the pump running but see no movement, the relief valve might be stuck open. This sends fluid back to the tank instead of to the actuator.
Sometimes, the actuator itself is the problem. It could be jammed or have a broken part inside. Try moving the actuator by hand (if safe). If it does not budge, you may need to repair or replace it.
If you still get no response, check the control signals. Some systems use electric switches or sensors to tell the valve when to open. A loose wire or blown fuse can stop everything. Look for warning lights or error codes on the control panel.
Here’s a table to help you match symptoms with possible causes:
| Symptom | Possible Cause | What to Do |
|---|---|---|
| No movement, no sound | Power off | Check switches and fuses |
| Pump runs, no movement | Valve closed or blocked line | Open valve, clear blockage |
| Fluid leaks | Broken seal or hose | Replace damaged parts |
| Error light on | Electrical fault | Inspect wiring and sensors |
Stay calm and work through each step. Most “no response” problems have a simple fix. If you cannot find the cause, ask a supervisor or call a hydraulic technician. You will get your system moving again soon.
When to Replace Hydraulic Flow Control Valve
Signs of Wear or Damage
You might wonder when it’s time to swap out your hydraulic flow control valve. Machines don’t last forever. Valves show signs when they need attention. If you spot these clues, you should think about replacing the valve.
- Internal or external leaks
- Erratic or slow operation
- Unusual noises like hissing or rattling
- Overheating near the valve
- Sudden changes in system pressure
- Excessive wear and tear on the valve body
- Faulty seals and O-rings
- Poor maintenance history
You can catch these problems early if you check your valve often. Try these steps:
- Look at the valve for cracks, rust, or oil stains.
- Test the hydraulic pressure with a gauge.
- Watch the fluid in your reservoir for dirt or metal bits.
- Use flow meters or sensors to see if the valve controls flow as it should.
Tip: If you hear strange noises or see oil where it shouldn’t be, don’t wait. Replace the valve before it causes bigger trouble.
Persistent Leaks
Leaks are a big warning sign. If you fix a leak and it keeps coming back, your valve probably needs to go. Sometimes, seals wear out or the valve body cracks. You might see oil dripping from the valve or notice wet spots under your machine.
Here’s a quick table to help you spot leak problems:
| Leak Location | What It Means | What To Do |
|---|---|---|
| Valve body | Crack or worn-out part | Replace valve |
| Seal or O-ring | Damaged or old seal | Change seal |
| Fitting or joint | Loose or corroded connection | Tighten or replace |
If you keep tightening fittings and changing seals but the leak returns, it’s time for a new valve. Leaks waste oil and can make your machine unsafe.
Alert: Never ignore a persistent leak. It can lead to low pressure, overheating, or even machine failure.
System Incompatibility
Sometimes, your hydraulic system changes. Maybe you upgrade your pump or switch to a new fluid. If your flow control valve doesn’t match the new setup, you’ll see problems. The valve might not handle the right pressure or flow. Seals could break down if the fluid isn’t compatible.
You should check these things:
- Does the valve fit your new pressure range?
- Can it handle the flow your system needs?
- Are the seals made for your hydraulic fluid?
- Is the valve the right size and type for your machine?
If the answer is “no” to any of these, you need a new valve. Using the wrong valve can cause leaks, poor performance, or even damage other parts.
Note: Always match your valve to your system. If you upgrade your equipment, check if your valve needs an upgrade too.
Replacing your hydraulic flow control valve at the right time keeps your machine safe, efficient, and easy to maintain. Don’t wait for a big failure. Watch for signs, fix leaks, and make sure your valve fits your system.
Choosing the Right Hydraulic Flow Control Valve
Pressure and Flow Range
You want your hydraulic system to work smoothly. That starts with picking a valve that matches your pressure and flow needs. First, check the minimum and maximum flow rates your system uses. Write these numbers down. You also need to know the ideal flow rate for your job. If you choose a valve that is too small, you will not get enough flow. If you pick one that is too big, you might lose control or waste energy.
Next, look at the pressure. Find out the highest and lowest pressures in your system. You should also check the maximum pressure drop the valve can handle. If you ignore these numbers, you could end up with a valve that leaks or fails. Always match the valve’s pressure rating to your system. This keeps everything safe and running well.
If you pick the wrong valve, you might see problems like low flow, high pressure drops, or even system failure. Take your time and get these numbers right.
Flow Direction and Valve Type
Hydraulic flow control valves come in different types. Each one works best for certain jobs. You need to know which way the fluid will move in your system. Some valves only let fluid go one way. Others let it move both ways. Check for arrows or labels on the valve body. These show you the right direction.
Here are some common valve types and what they do:
| Valve Type | Flow Direction | Best Use |
|---|---|---|
| One-way (Check) | One direction only | Stops backflow |
| Two-way | Both directions | Controls flow in both directions |
| Needle | Adjustable | Fine flow adjustments |
| Ball | On/off | Quick shut-off, not for control |
Think about what your machine needs. If you want smooth, steady movement, pick a valve made for that. If you just need to stop or start flow, a ball valve might work. Always match the valve type to your system’s job.
Thread and Size
Now, let’s talk about threads and size. You need a valve that fits your pipes and hoses. Check the thread type on your system. Common types include NPT, BSP, or metric threads. If you mix them up, you will get leaks or loose fittings.
Measure the size of your pipes. The valve should match these sizes exactly. If the valve is too small, it will choke the flow. If it is too big, you might have trouble installing it. Always double-check the size before you buy.
- Match the valve threads to your system threads.
- Pick the right size for your pipes and hoses.
- Check the manufacturer’s specs for details.
A good fit means fewer leaks and easier maintenance. You save time and money by getting it right the first time.
Material and Seals
When you pick a hydraulic flow control valve, you need to think about what it’s made of. The material and the seals inside the valve can make a big difference in how long your system lasts and how well it works. If you choose the wrong material, your valve might rust, wear out, or even break down fast.
Common Valve Materials
Most hydraulic valves use one of these materials:
| Material | Best For | Watch Out For |
|---|---|---|
| Steel | High pressure, tough jobs | Can rust if not coated |
| Stainless Steel | Corrosive fluids, outdoor use | Costs more |
| Brass | Low pressure, clean fluids | Not for strong chemicals |
| Aluminum | Lightweight, mobile equipment | Not for high pressure |
Steel valves work well for most jobs. They handle high pressure and last a long time. If you work with water or chemicals, stainless steel is a better choice. It does not rust and stands up to harsh fluids. Brass and aluminum are lighter and good for small machines, but they do not handle tough jobs or strong chemicals.
Tip: Always check what kind of fluid you use. Some fluids can eat away at certain metals.
Seal Choices Matter
Seals keep the fluid inside your valve and stop leaks. They also protect the moving parts. If you use the wrong seal, you might see leaks, swelling, or even a stuck valve.
Here are some common seal materials:
- Nitrile (Buna-N): Works with most oils. Not good with strong chemicals.
- Viton: Handles high heat and many chemicals. Costs more but lasts longer.
- EPDM: Good for water-based fluids. Not for oil.
- PTFE (Teflon): Handles almost any fluid. Very tough and slippery.
You should always match the seal to your fluid. If you use a new type of oil, check if your seals can handle it. Hot fluids need seals that won’t melt or get soft.
Note: If you see leaks after changing oil, your seals might not match the new fluid.
Quick Checklist for Material and Seals
- Check your system pressure and fluid type.
- Pick a valve body that resists rust and wear.
- Match the seal material to your hydraulic fluid.
- Think about temperature and chemicals in your system.
- Ask your supplier if you are not sure what to choose.
Choosing the right material and seals keeps your hydraulic system safe, leak-free, and running longer. Take a few minutes to check before you buy. It can save you a lot of trouble later.
Info Buyers Need Before Ordering Flow Control Valve
Valve Type and Pressure
Before you order a hydraulic flow control valve, you need to know exactly what your system needs. Start by figuring out the type of valve that fits your job. Do you need a simple on/off valve, or do you want to control the flow more precisely? Maybe your system needs a needle valve for fine adjustments, or a ball valve for quick shut-off. Each type works best for certain tasks.
Next, check the pressure. Every hydraulic valve has a rated pressure. This number tells you how much force the valve can handle before it fails. If you pick a valve with a lower pressure rating than your system, you risk leaks or even dangerous blowouts. Always match the valve’s pressure rating to your system’s highest working pressure. Write this number down before you shop.
Tip: If you are not sure about your system’s pressure, look at the pump label or check your machine’s manual. Never guess when it comes to pressure.
Flow Range and Speed
You also need to know how much fluid will move through the valve. This is called the flow rate. If you choose a valve that is too small, your machine will run slow or might not work at all. If the valve is too big, you could lose control and waste energy.
Think about how fast you want your actuator or cylinder to move. The flow rate controls the speed. Write down the minimum and maximum flow rates your system uses. You can usually find this information in your equipment manual or by asking your supplier.
Here’s a quick checklist to help you get the right numbers:
- Find out the rated pressure of your hydraulic system.
- Determine the required flow rate for your application.
- Decide how fast you want your actuator or motor to move.
If you have these numbers ready, you can pick a valve that matches your needs and keeps your system running smoothly.
Direction and Connection
Now, let’s talk about direction and connection. Hydraulic flow control valves can control fluid in one direction or both. Some valves only let fluid flow one way. Others allow flow in both directions. You need to know which one your system uses. Check for arrows or labels on your old valve, or look at your system diagram.
Connections matter, too. You want the new valve to fit your pipes or hoses without leaks. Check the size and type of threads on your system. Common types include NPT, BSP, or metric threads. If you mix them up, you could end up with leaks or loose fittings.
Here’s a simple table to help you remember what to check:
| What to Check | Why It Matters |
|---|---|
| Flow direction | Prevents backflow or wrong operation |
| Connection size/type | Ensures leak-free, easy installation |
| Thread compatibility | Avoids cross-threading and damage |
Note: Always double-check your connection sizes and thread types before you order. This small step saves you time and trouble during installation.
By gathering these details—valve type, pressure, flow range, direction, and connection—you make sure your new hydraulic flow control valve will fit and work right the first time.
Thread, Material, Seals
When you order a hydraulic flow control valve, you want it to fit your system perfectly. Three things matter a lot here: thread type, valve material, and seal choice. If you get these wrong, you might face leaks, rust, or even a valve that just won’t fit.
Thread Type
You need to match the valve threads to your pipes or hoses. Threads come in different shapes and sizes. Some common types are NPT (National Pipe Thread), BSP (British Standard Pipe), and metric threads. If you mix them up, you can get leaks or cross-threaded fittings. Always check your system’s thread type before you buy.
| Thread Type | Where You See It | What to Watch For |
|---|---|---|
| NPT | North America | Tapered, needs sealant |
| BSP | Europe, Asia | Parallel or tapered |
| Metric | Machinery, global use | Check pitch and diameter |
Tip: Take a picture or sample of your old valve to the supplier. This helps you get the right thread every time.
Valve Material
The material of your valve affects how long it lasts and how well it handles your fluid. You want a valve that stands up to pressure, temperature, and whatever fluid you use. Here are some popular choices:
- Steel: Strong and tough. Good for high pressure. Can rust if you use water-based fluids.
- Stainless Steel: Handles chemicals and water. Won’t rust. Costs more but lasts longer.
- Brass: Works for low pressure and clean fluids. Not for strong chemicals.
- Aluminum: Light and easy to install. Not for high pressure or harsh fluids.
Pick a material that matches your job. If you use chemicals or work outdoors, stainless steel is a safe bet. For most shop jobs, steel works fine.
Seal Selection
Seals keep the fluid inside your valve and stop leaks. Not all seals work with every fluid. You need to match the seal material to your hydraulic oil or fluid.
| Seal Material | Good With | Avoid With |
|---|---|---|
| Nitrile (Buna-N) | Most oils, water-glycol | Phosphate esters |
| Viton | High temp, many chemicals | Some brake fluids |
| EPDM | Water-based fluids | Mineral oil |
| PTFE (Teflon) | Almost any fluid | Rarely a problem |
Note: If you change your hydraulic fluid, check if your seals still match. The wrong seal can swell, crack, or leak.
When you order, tell your supplier about your fluid, pressure, and temperature. This helps them pick the right valve and seals for you. If you are not sure, ask for help. It’s better to ask now than fix a leak later.
Conclusion
You want your hydraulic system to work well and stay safe. Always follow safety steps before you start. Use the right tools for the job. Make sure you know what kind of valve you have. Change the settings a little at a time. Check the manual from the manufacturer every time you work.
| Key Takeaway | Description |
|---|---|
| Safety Protocols | Wear PPE, use lockout/tagout, and depressurize the hydraulic system first. |
| Proper Tools | Use wrenches, flow meters, and pressure gauges for best results. |
| System Understanding | Know your valve and how it works in your hydraulic system. |
| Incremental Adjustments | Adjust slowly for better control. |
| Consult OEM Manual | Always follow the manual for your valve. |
Pick the right valve for your system. Take care of your equipment with regular checks. If you need help, contact Chenyang Hydraulic for standard or special valves. If the job seems hard, ask an expert or the manufacturer for advice.
FAQ
How do I know if my flow control valve needs adjustment?
You might notice your machine moves too fast or too slow. Sometimes, you hear new noises or see jerky movement. If you see leaks or pressure changes, check the valve.
Can I adjust a hydraulic flow control valve while the system is running?
You can, but you must follow safety steps. Wear PPE. Make small adjustments. Watch for leaks or strange sounds. If you feel unsure, turn off the system first.
What happens if I overtighten the adjustment screw?
If you overtighten, you can damage the valve threads. The valve might leak or stop working. Always turn the screw gently. Stop if you feel resistance.
How often should I check or adjust my flow control valve?
Check your valve during regular maintenance. If your machine acts differently, check sooner. Write down any changes you make. This helps you track problems.
What tools do I need to adjust a hydraulic flow control valve?
You need a wrench, a screwdriver, and safety gear. A pressure gauge and flow meter help you set the valve just right. Use a marker to note your settings.
Can I use any hydraulic fluid with my valve?
No, you must use the fluid your valve and seals support. Check your manual. Some fluids can damage seals or cause leaks. Ask your supplier if you are not sure.
What should I do if the valve keeps leaking after adjustment?
Try tightening the fittings gently. Replace worn seals. If leaks continue, you may need a new valve. Never ignore leaks—they can cause bigger problems.